Friday, November 28, 2014

a little odd

 photo IMG_1434_zpsc88cba42.jpg

I think it’s a little odd to me that I have never made meatloaf before. Because what is meatloaf if not an oversized meatball? And everybody knows that meatballs are my spirit food. So it makes me wonder why it took me until the tender age of 34 to make a meatloaf of my own. And what a meatloaf it is. Super straightforward with only one additional step- finely chopped mushrooms sautéed in a little bit of soy sauce. It adds a depth of salty flavor that is basically exactly what I want out of any dish made up of a mound of ground beef. It always makes me chuckle though because when I can’t refer to meatloaf without thinking of this completely amazing fake Guy Fieri menu- which if you haven’t read yet stop everything you’re doing and do so right now. I was literally reduced to tears reading it for the first time.

 photo IMG_1440_zps959b306b.jpg

But it’s funny because I do dig meatloaf because it’s nuthin’ fancy. It's definitely not the sexiest dish out there…but it doesn’t have to be. And it doesn’t have to pretend it’s anything that it’s not. All that's going on here is classic comfort food through and through. Simple to prepare, makes the house smell delicious on a Sunday afternoon and tastes all the better over a pile of fluffy mashed potatoes. Now I’m not gonna deny that this is a pretty hefty dish, but it’s the kind of classic chow that’s perfect for dishing up for your in-laws and mom for Sunday supper. In order to cut the richness of the meal, I also like to include a lightly dressed green salad and some roasted green beans, or asparagus. Nuthin’ fancy, but there’s nuthin’ wrong with that.

 photo IMG_1438_zpsb490b9b2.jpg

PORKY’S ‘NUTHIN’ FANCY’ MEATLOAF

1 ½ lb. ground beef
1 lb. ground pork
One yellow onion, grated
½ cup caramelized onions, finely chopped (optional)
7-8 mushrooms, cleaned and finely chopped
2 tsp. olive oil
1 tsp. butter
1 ½ tbs. soy sauce
½ cup grated Parmesan cheese
¼ cup Fresh flat leaf parsley, chopped
½ cup Panko breadcrumbs
Salt
Pepper
1 egg
2-3 tsp. Worcestershire
1-2 tbs. ketchup
1 ½ tsp. Dijon

For Glaze:

¼ cup brown sugar
Splash Worcestershire
1 tsp. Dijon
¾ cup ketchup

 photo IMG_1439_zps3e239768.jpg

Preheat oven to 375. Heat butter and olive oil in a sauté pan over medium heat. Wipe mushrooms clean with a damp rag and then chop, fairly finely. Add to pan and sauté for about five minutes. Deglaze the pan with soy sauce, stirring constantly and let cook one or two minutes more. Remove from heat and set aside; allow to cool for a few minutes. While the mushrooms first get going, cut onion into quarters and grate on the large-holed side of a box grater. If using caramelized onions (which I used only because I had some in the fridge that needed to be used up) place in the bowl of a small food processor and pulse until finely chopped.

 photo IMG_1437_zps49b17128.jpg

In a large bowl combine ground beef and ground pork, season with a generous pinch of salt and pepper. Add onions, both raw and caramelized (if using), add parmesan, parsley, breadcrumbs and sautéed mushrooms. Then, drop in the egg, Worcestershire, ketchup and Dijon. Using clean hands, with your fingers spread claw-like, combine everything together loosely, taking care not to over work the meat. Lightly oil the bottom of a 9x13 baking dish and gather the meat mixture together, wrangling it into a loaf-like shape. It can be a little free form and even though I have never tried the alternative, I think I much prefer this to using a bread loaf pan, because with this method you get a higher ratio of crusted outer layer to inner juicy meat layer. Dang, now I want to make another meatloaf.

 photo IMG_1445_zpsd510a880.jpg

In a small, nonstick sauce pan combine brown sugar, ketchup, Dijon and Worcestershire. Heat over medium low heat until a bit bubbly and all sugar is dissolved. Spoon glaze over the top of your meatloaf and let it drizzle down the sides. Place the whole shebang into your preheated oven and bake for about 40-50 minutes or until a meat thermometer inserted in the middle reads 165.

 photo IMG_1441_zps63bffb23.jpg

Serve with simple garlic mashed potatoes and a green vegetable or salad. This makes for great leftover sandwiches if you should happen to have any left. There were five of us eating dinner in this instance, so we had only the tiniest bit of leftovers.

 photo IMG_1443_zpseb100ec9.jpg

EASIEST GARLIC MASHED

4-5 russet potatoes, scrubbed, peeled and chopped
2-3 whole cloves peeled garlic
2-3 tbs. butter
Scant ¼ cup half and half

Cut potatoes into large chunks and cover with cold water in a medium to large stock pot, depending on how many potatoes you’re using. Add garlic, cover and bring to a boil over high heat. Remove the lid and let crank, until potatoes are soft when pierced with a knife. Drain water, return potatoes and garlic to pan, add butter, half and half and two big pinches kosher salt. Crank a bit of crushed black pepper over the top and puree with an immersion blender until lump-free and creamy. Don’t have an immersion blender: mash 'em old school with a regular masher. Taste test and add more salt, butter or another splash half and half if needed. Serve immediately.

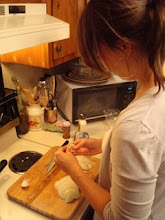
 photo IMG_1446_zps521f719b.jpg

Creative Commons License

Thursday, October 16, 2014

too big to ignore

 photo IMG_1433_zps13250633.jpg

I was told to eat eggs by my midwife and I’m nothing if not vigilant at following instructions when it comes to food. Say what’s that you say? Midwife, Jess? Yes it’s true, there’s something in my belly that, for once, is not a burrito*. Spoiler alert: it’s a baby and we’re all feeling pretty stoked about it! I’m actually quite far along at this point- over the halfway mark at 24 weeks (or like 5-6 months in regular people speak). Baby Dickens will make his or her debut around the first week of February so let’s pray that we don’t have a 20 foot snow storm with three day power outages; because while I’m pretty burly when it comes to many things, giving birth to a baby in an unheated wood paneled basement does not sound like my idea of a good time.

*I can in no way whatsoever guarantee that at your particular reading of this blog post that I don’t also have a burrito in my belly.

 photo IMG_1417_zps606bfd18.jpg

So the past few months of being lazy were totally justified- I mean. I’d say. As a white lady of a certain age, I’m pretty used to beating myself up if my day off productivity level a nice midpoint between Martha Stewart and Jesus. I like to Get Stuff Done- blog post (check), two loads of laundry (check), make chicken stock (check), teach yoga class (check), make hugely unsuccessful attempt at growing herb garden (double check). So when I found out I was pregnant the first week of June I embraced the new need for lots of down time and I felt, completely fine ignoring much of the to-do list and just chilling out when I had some time to myself. I mean shit I’m growing a human, I think that’s task enough for a Tuesday, wouldn’t you say? It’s all together very liberating and a gal could really get used to this. Especially the ignoring-the-herb-garden part, because I’m already really good at that.

 photo IMG_1418_zps1e6524ad.jpg

I have been hesitant to share this big news here, because well, I haven’t been here all that much. And I didn’t want to come back and be all “Sup dudes, how’s your summer? B T dubbs I’m pregnant. It's yours.” Plus, online pregnancy announcements in this age of all things baby being hyper fetishized, make me feel sort of self conscious. I think they are cute- don’t get me wrong, just not for me. I don’t get the facebook baby announcement- mostly because it’s SO MUCH MORE FUN to tell people in person. They jump up and down and hug you and scream (well the ladies do) and you get to see real joy in their faces. And some people cry! And if you’re me you also cry. Every single person you tell you cry, even an odd elderly gentleman at work who asked me in a creepy tone if I was “with child.” It’s all just so hilarious and so emotional and so real I would never want to reduce it to likes and comments of ‘congrats’ punched out on an iphone while someone is waiting for the T.

 photo IMG_1420_zpsfaf6a04c.jpg

And you know we’ve always been an in-person kind of family. So, I didn’t want to share news like this in a blog post until it was, well, too big to ignore. Which, I totally am. I already look like I ate another, smaller, weaker pregnant lady and I kind of love it. The first trimester food is not your friend because it feels a bit like a three month hangover. You want food. You just don’t know if food is going to cooperate once it’s in your possession. At 14 weeks I turned the corner though and I went from wanting toast with a side of toast to craving, hm, All The Foods. Thank god I have had the kind of pregnancy where cooking is still my favorite leisure activity. My sister and some close friends lamented that they just didn’t have it in ‘em/ were too ill or exhausted to saddle up to the stove. Whereas during my first few exhausted, nauseous weeks in the first trimester even though I didn’t feel like eating all that much the kitchen was the only place I felt normal. I hope that is always the case. Even when I have this bambino strapped to my chest and I’m accidentally splashing sauces on their little face (just kidding…I’ll be more careful than that!) So anyways, enough about the baby, back to the eggs!

 photo IMG_1423_zpsda8b385a.jpg

BRIOCHE ‘BENEDICT’ BREAKFAST STRATA

Softened butter for pan
8-10 small brioche rolls, or about ¾ of a loaf brioche, preferably day-old
½ lb. Canadian Bacon, diced
½ cup shredded mozzarella
¾ cup shredded sharp cheddar
1/3 cup grated parmesan
10 eggs
2 cups whole milk
1 ½ tbsp. Dijon mustard
Salt and pepper

 photo IMG_1424_zps0e922b5a.jpg

Slice brioche into large chunks, about 1-2 inches square-ish. In a large glass baking dish or oven-safe skillet, spread a thin layer of butter evenly on bottom and sides of pan. Set a small skillet to medium heat and brown Canadian bacon for a few minutes on each side. Dump brioche chunks into pan and in a large mixing bowl combine eggs, milk, Dijon, salt and pepper. Whisk together thoroughly and fold in approximately ¾ of the shredded cheeses (cheddar and mozzarella only), reserving parmesan and remaining shredded cheeses for later use. Scatter Canadian bacon into pan with brioche and pour egg and cheese mixture over. Squish everything down a bit so all the bread has a chance to absorb the custard. Pinch a touch more salt and pepper over the top and then scatter on reserved cheeses, including grated parmesan. Chill up to 4 hours, but preferably overnight.

Optional step: I layered a sheet of plastic wrap and two heavy dinner plates on top of my strata to weight down the top so that all the bread would saturate in custard as it chilled and there would be no dry bits.

 photo IMG_1425_zps661c3aa5.jpg

In the morning one hour before baking: set strata out at room temperature; remove plastic wrap and plates, if using. Set oven to preheat at 375. Cover strata loosely with tin foil and bake, checking periodically for 45-50 minutes. Remove tin foil for last 10-15 minutes of baking so it gets golden brown and crusty on top. If your strata is especially soupy- cooking time may take closer to an hour. Mine was not because my brioche was a bit stale (which is ideal) so it soaked up every bit of egg. Cooking is done when a knife inserted into the middle comes out clean and it’s golden brown on top.

 photo IMG_1426_zpscdc09ac1.jpg

Let sit about 5-10 minutes before serving. We served this with a pot of baked beans, some fruit salad and yogurt- it was a super hearty fall brunch. I also ate the leftovers for a whole week and did not get tired of it once. It is by no means a healthy breakfast dish- it’s a total comfort dish and, aside from chilling overnight, only takes about ten minutes to prepare. Perfect for a brunch or lunch crowd and can serve at least 6 people. Or one, highly motivated pregnant lady in her second trimester.

 photo IMG_1431_zps2fa6ea9f.jpg

Creative Commons License

Tuesday, September 30, 2014

how to improve anything

 photo IMG_1385_zpse103270c.jpg

You know on Sunday it was 83 degrees out. And I have this killer potato salad recipe that the unseasonably warm weather made me feel like I could get away with posting. Even though you and I both know that potato salad season is pretty much officially over. But today? Today it is grey and chilly and I just spent a few delicious hours in the kitchen making stock and pumpkin muffins and a quick coconut curry sauce for tomorrow’s dinner. Today is a day for real food. Not appetizers or cookout side dishes. And it just frankly does not feel like potato salad weather. It feels like we need something savory and wholesome and I’ve got just the thing.

 photo IMG_1379_zps17852ef3.jpg

This recipe is continued proof of the well-tested fact that you can improve any food in the whole world by wrapping it in prosciutto. Heck, I bet you could even make a few undesirable people in your life more appealing by wrapping them in a few slices! Boneless skinless chicken breasts are like the background music of weeknight dinners. Somehow simultaneously boring and annoying. So easy to prepare that they are hard to ignore, but often so quick to dry out that often fall far short of satisfying. However, when carefully wrapped in salty, crisped prosciutto and smothered in a savory mushroom sauce, they turn from “oh chicken?” into “oh SNAP!” in no time. This was a Sunday supper many weeks back; but if you have the time it’s relatively quick enough work for a weeknight meal.

 photo IMG_1383_zpse98e9e40.jpg

PROSCIUTTO WRAPPED CHICKEN with 
SHERRIED MUSHROOM PAN GRAVY

For the chicken breasts: 

3-4 chicken breasts
6 to 8 slices of thinly sliced prosciutto
Parmesan cheese
Salt and pepper
3 tbs. olive oil
2 tbs. butter

For the pan gravy: 

1 shallot, finely minced
2 cloves garlic, minced
1 lb. button mushrooms, wiped clean and thinly sliced
1-2 tbs. butter
¾ cup cream sherry*
Chicken stock (if needed)
½ tsp. Dijon mustard
Heavy cream or half and half (optional)
Salt and pepper

*for my feelings about sherry check this post

Generously salt and pepper each side of your chicken breasts; then dust both sides with parmesan cheese. Wrap one or two slices of prosciutto around the middle of each breast so that it overlaps to form a nice ‘belt’. Mmmm prosciutto belts.

 photo IMG_1382_zpsbd7ea515.jpg

In a large skillet or braising pan, heat butter and oil over medium to medium-high heat until butter is slightly foamy but still pale yellow and pan is nice and hot. Place chicken, seal side down in pan and let cook approximately 4 minutes per side, until nicely browned and prosciutto has crisped a bit. Pull chicken from pan and set aside; it will complete cooking through in the mushroom sauce in a few moments.

 photo IMG_1386_zpse3f5f50f.jpg

Reduce heat to medium and add another small drizzle of oil to pan, plus 1-2 tbs. butter. Sauté shallots until the translucent and fragrant (about 1-2 minutes) add garlic and mushrooms, generously salt and pepper; and stir together well to completely coat in butter and oil. Let mushrooms cook about 5-6 minutes, stirring every so often, until they have purged some liquid, browned and shrunk down a bit. Turn heat to high and pour sherry in, using a wooden spoon or spatula to scrape the bottom of the pan as the sherry reduces. Add Dijon and a few splashes of chicken stock and maybe another teaspoon of butter for good measure. Let reduce and thicken for about 3-4 minutes, then turn heat down to medium. Taste for seasoning, adding salt and pepper if necessary. If it still tastes boozy from the sherry, turn the heat back up and let reduce a little more, if you feel there is not enough liquid, splash in a bit more stock. Return chicken breasts to pan for an additional few minutes, or until a thermometer inserted into each breast reads 165 degrees. Remove chicken from pan and plate, taste mushroom sauce, season if necessary and if you choose, swirl in just a touch of half and half or cream to thicken the sauce. Pour sauce and mushrooms over chicken. Serve immediately.

Serve with thick slices of olive oil rubbed grilled foccacia bread and a green salad or vegetable dish.

 photo IMG_1387_zps2b0c9cc6.jpg

Creative Commons License

Wednesday, September 10, 2014

open concept

 photo IMG_1361_zps38b3b2ff.jpg

Oh haaaaay....guess I wasn't joking about slacking off and taking advantage of summer. Second week in September and I feel like it can't possibly already be this far into fall. The good news is I have an enormous backlog of deliciousness to share with you. Like to hear about it? Here it go... I cook without rules and often without any concept whatsoever. Like most households we tend to have our standard batch of groceries that we buy each week and that gets us through at least 5 breakfasts and lunch and maybe the one or two dinners we actually get to sit down to together. And it always, always has to be supplemented by additional trips to the grocery store. Fortunately, not a big deal for me since I am financially obligated to be inside not just a grocery store but the one we primarily shop at at least 35 hours per week.

 photo IMG_1346_zps0171cdaa.jpg

When you have a decently stocked pantry and a few odds and ends of veggies but no particular vision, that is when kitchen creativity gets cookin. At least if you’re a geek like me. Day dreaming about the contents of your fridge and attempting to make a whole meal of food out of them is one of my most favorite hobbies and it’s also the kind of free association thinking that creates such Benson family favorites as Potato Tacos or my most coveted Transcendental Burritos and pretty much any easy pasta dish that I’ve had cause to cook up in the past decade. One such invention that has been on recent rotation is this here. An amalgam of components that we have dubbed “Yummy Bowls” because basically, well, they come in a bowl and they are yummy. It’s not that deep.

 photo IMG_1344_zps070d7e95.jpg

More a loose framework than an actual recipe this is one of my favorite things to make for lunch on a day off, or for a quick, but filling and healthy supper, or what I make for lunch when a vegan comes over (hi Ashley!). It ends up being a mish mash of whatever produce I have around, over a bed of starch (rice, cous cous or even farro) and always either some go-to crispy baked tofu or this here delicious and fast marinated grilled tofu. This preparation does everything I want a proper recipe to do to tofu- infuses it with mouth watering flavor and gives it an appealing texture – crispy on the outside, tender within. We like to garnish these with a dollop of hummus, some Sriracha and a sunny side up egg (but of course not when the vegans are coming). It’s super filling and pretty virtuous, so I don’t even feel bad when I eat a  half whole entire caramel filled chocolate bar after dinner. If I make this for myself for lunch, I have enough leftover to make myself a smaller Yummy Bowl the next day as leftovers. If I make it for myself and someone else, we usually house it all. It’s healthy after all and there’s only so much virtue to go around.

 photo IMG_1351_zpsd39b9391.jpg

YUMMY BOWLS (we're working on the trademark for this and Potato Tacos)

White or brown rice, prepared according to package directions
Grilled Marinated Tofu
Easy Baked Sweet Potatoes
Sauteed Mushrooms
Sauteed Spinach, Peas and Red Onion
2 Eggs, poached or sunny side up

 photo IMG_1353_zps7d7b1496.jpg

GRILLED MARINATED TOFU

2 scallions, minced
2 cloves garlic, minced
1-2 tsp. grated ginger
¼ cup soy sauce
¼ cup olive oil
2 tsp. honey
A few shakes rice vinegar
1-2 squeezes Sriracha or other hot sauce
1 package extra firm tofu, pressed, drained and sliced

To press and drain tofu: remove from packaging and place in a shallow bowl or on a plate with a bit of depth. Stack 1 or 2 plates on top and weight with two cans, or something equally heavy. Let press for 15-20 minutes before draining off excess water and slicing. This is a serious pro tip for getting a nice texture out of your tofu- even though it takes extra prep time I never skip this step.

 photo IMG_1345_zps9e431490.jpg

While the tofu is pressing, prepare your marinade in a large Ziploc bag. Combine all ingredients and squish together gently to combine. Once the tofu is pressed and sliced, add to bag, squeezing out extra air as you close and set to marinate in the fridge. 30 minutes, or up to overnight.

 photo IMG_1347_zpsbbcb3a76.jpg

Heat grill to medium heat. Pour olive or canola oil onto a paper towel and using tongs, grease the grates of your grill. Place tofu on grill and cook, about 3-5 minutes on each side, flipping once. It may still stick a bit, becase there is no fat in the actual tofu itself. I simply jimmied it off with a nice sharp spatula and made sure to regrease the grill with a little bit more oil before flipping to the second side. Remove and enjoy, either in yummy bowls or as a salad topping or simply a quick, high protein snack.

 photo IMG_1352_zps4f12da57.jpg

EASY BAKED SWEET POTATOES 

1-2 large sweet potatoes, peeled and diced
Olive oil
Salt, pepper

You can’t get much easier than this. Peel and cube potatoes and toss with a drizzle of oil, a healthy pinch of salt and a few cranks of pepper. Roast at 400 for 30-40 minutes or until tender, tossing at least once. These are always a delicious easy side dish or nice salad topper.

 photo IMG_1354_zpseb2ef515.jpg

SAUTEED MUSHROOMS

1 bunch button or cremini mushrooms, wiped clean with a damp cloth
Olive oil
Butter
Salt, pepper

Stop me if I’m insulting your intelligence at any point..every component here is dead simple, but I also like to really follow through on the directions. These mushrooms, like the sweet potatoes and most other components of the Yummy Bowls are super easy, work as a simple side dish and require little more than trimming and chopping. Heat equal parts butter and olive oil in a skillet over medium heat (about 1 ½ tsp. of each depending on how many mushrooms you’re cooking). Add mushrooms and a sprinkle of salt. Let brown, turning every so often until they have purged their liquid and darkened in color, about 8-10 minutes. Season again with salt and black pepper.

 photo IMG_1355_zps858e5c1b.jpg

SAUTEED SPINACH, PEAS and RED ONION

1 bunch baby spinach leaves
½ red onion, thinly sliced
¼ - ½ bag frozen sweet peas
Olive oil
Salt, pepper

This component is totally the result of what I had on hand, if that wasn’t obvious already. Once the mushrooms were cooked, I wiped out the same skillet, heated up a bit more olive oil and sautéed first the onion, then spinach and peas until everything was cooked through nicely. Plenty of salt and pepper for flavor and we’ve got ourselves a pretty packed, nice looking Yummy Bowl situation.

 photo IMG_1356_zpsa07995a0.jpg

EGGS and RICE I’m not going to tell you how the poach/fry an egg or make rice. We all have limits and I think I crossed mine with the spinach instructions.

 photo IMG_1358_zpsabe2a4b6.jpg

Layer all components in a big ass bowl, with the egg on top. Sprinkle with salt and pepper and maybe season a bit with hot sauce, Sriracha or any sauce you’re into. Salt and pepper over the top, slice into the egg so the yolk runs down over everything and….you see we don’t call it a Yummy Bowl for nothing.

 photo IMG_1362_zps5e90524d.jpg

Creative Commons License

Tuesday, July 22, 2014

all that matters

 photo IMG_1375_zps322b9649.jpg

Sorry for being such a slacker lately. I would love to breezily post recipes and stories every single week like clockwork but you see, the only one in charge of my schedule is me. And I have proven myself time and time again to be unmanageable. It’s not that my heart isn’t here; it is. It’s just that my body is usually at the beach- and I don’t have a much better excuse than that. I take leisure time in the summer extraordinarily seriously. Massachusetts in the summer is glorious, absolutely glorious. It’s also quite dreamy through September and parts of October. And then somewhere around the first of November it goes downhill and the rest of the year is spent in hibernation with many pots of soup and bottles of red wine. So when summer comes round, on my days off when I would normally check lots of pertinent tasks off my to-do list, including maintaining this here blog, I instead feel zero obligations and I park my ass at the beach with a meatball sub, because, apparently, shame is not an emotion that I feel and because I take summer very, very seriously.

 photo IMG_1367_zps42eefc3c.jpg

The crown jewel of summer always has been the 4th of July. For as long as I can remember, my family would gather together at my aunt and uncle’s house by the beach (where Paul and I lived last summer while we were preparing to buy our house) It was (big sigh) the greatest house ever. Screened in porch, large, partially shaded yard, ample parking, and a slow, easy shuffle down to a beautiful New England beach. It was the perfect place for 4th of July. We spent the day pruning up our fingers in the Atlantic, the afternoon drinking a few too many watermelon margaritas on the porch and the evening eating a big fat 4th of July feast. At some point my aunts would sing ‘Grand Old Flag’ at the top of their lungs, sometimes marching, with flags and hats, mostly fueled by Chardonnay. It was a good place to be.

 photo IMG_1368_zps11796629.jpg

So at the end of last summer when Linda and Eric finally sold their house on Grasshopper Lane, we were all a bit verclempt. As expected. This is the first summer in my life I haven’t had a direct blood relative with free beach parking access- so you can imagine it’s been a pretty tough adjustment for me. I’ve lived a charmed life in terms of access to beaches and that, my friends, is a difficult thing to bid adieu. So this year, as the 4th loomed and the nostalgia of perfect family holidays danced in the memories, I decided that we simply had to get together. Even if it was in a landlocked cul-de-sac closer to the city than any coastal breezes. I’d buy squirt guns and water balloons and the food would be just as good and the company same as always and it would be great. And you know what? It was.

 photo IMG_1365_zps0c6d8736.jpg

What you realize as you grow up and places you are very attached to get sold to new families, like the house you grew up in, your grandmother’s digs, or the family beach house is that as sad as it is to close those doors for the final time, no four walls can define a family’s joy. The happiness of being together, sharing food, laughter, good news and a little too much wine simply cannot be limited to any particular location. What we share is beyond limitation, geographic or otherwise. And it always helps that our food is the MOST bomb around. So this July we had Uncle Billy hitch his smoker to a trailer and drive it over to our side yard. And we had smoked almonds and hotdogs with three different sauces. And then a few perfectly smoked pork butts were pulled and sliced, piled on homemade brioche rolls and slathered with not one, but four different homemade barbeque sauces. We had baked beans and two types of slaw and lobster salad so fresh you could still taste the ocean water. But most of all we had each other and we all know that’s all that really matters.

 photo IMG_1373_zps6a6bc80c.jpg

BARBEQUE BAKED BEANS 
(adapted, just barely, from Pioneer Woman)

6 slices bacon, cut into 1” pieces
1 medium onion, cut into small dice
1/2 medium green pepper, minced
1 jalapeno, seeded and minced
Worcestershire sauce (optional)
Bourbon (optional)
3 large cans (28 oz.) pork and beans
3/4 cup barbecue sauce
1/4 cup brown sugar
1/4 cup apple cider vinegar
2 tablespoons Dijon mustard

 photo IMG_1376_zps31c95bf0.jpg

Preheat oven to 325 degrees. In a large Dutch oven or deep skillet, fry bacon over medium-high heat until partially cooked and about ¼ cup drippings have released. Scoop out bacon and set on paper towels to drain. Reduce heat to medium, add onion, green pepper and jalapeno to the pan and sauté until tender and fragrant; about 5 minutes. If using Worcestershire and bourbon (I use Makers), raise the heat to medium-high/ high and sprinkle in a few generous drizzles of Worcestershire to deglaze the pan with it. Then, repeat with bourbon. Pour in a scant ¼ cup, crank heat to high and use a wooden spoon to scrape any browned bits off the bottom of the pan.

 photo IMG_1372_zps437fe977.jpg

Reduce heat to medium and add all three cans of beans and remaining ingredients, stirring to thoroughly combine. Taste and adjust seasonings if necessary. Since I was a bit generous with the vinegar and Worcestershire, my beans were a bit tangy at this stage. Which I wanted because I knew the whole mixture would sweeten substantially as it baked- keep this in mind. Let beans simmer a few minutes and then transfer the whole pot to the oven. If your skillet is too big to fit you can pour the beans into a 13x9 inch baking dish. Top the beans with the reserved bacon and bake until bubbly and bacon is crisped, about 2 hours.

To make ahead: I made my beans two days prior to my BBQ. I baked them for one hour then let the whole pan cool. Store in the fridge until ready to serve and either bring up to heat in a 325 degree oven for an additional hour; or, on the stove top, covered, over low heat for one hour.

 photo IMG_1377_zps8a889eea.jpg

  Creative Commons License
 
Creative Commons License
This work is licensed under a Creative Commons Attribution-Noncommercial-No Derivative Works 3.0 Unported License.