So, it snowed here. Like, a lot. And I got a real, live snow day just like back when I was young. So what did I do with this gift of time off? Did damage in the kitchen, of course. Oh, I also shoveled wet, heavy snow like a mofo and also braved the snowpocalypse to go get a manicure. Because apparently, although the whole Commonwealth was in a state of emergency the only people required to report to work yesterday were emergency medical personnel and the lady who does nails at Nails & Spa on Gallivan Boulevard in Dorchester. Don’t worry we tipped her like a million dollars (or ten) for risking her life to provide vital cuticle care in this time of inclement weather.
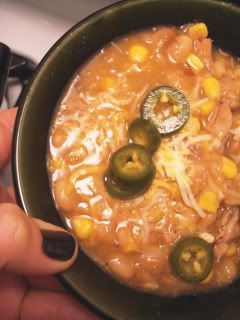
So what else did I do besides exploiting the one poor soul who had to work yesterday? I made chili. A white bean and chicken chili to be exact. I’ve had thoughts about this kind of chili for a long time now and I figured what better time than a snowstorm to turn the idea into a reality. The kind of reality I can eat garnished with shredded cheese and pickled jalapenos while I wear sweatpants all day long. Yee haw.

I have to confess I’m normally “just not that into” chili. The regular red kind with the kidney beans and hamburg and all that. In fact, even the black bean chili I made on here before, I really wasn’t head over heels for. I think I like chili in as much as I like the melted cheese which garnishes it and then as for the rest of the cup, I could take it or leave it. BUT, I love white beans and I love chicken, so I had a feeling if there ever was any kind of chili that I would feel a little more smitten with, it would be this kind.
 CHIPOTLE CHICKEN CHILI with PICKLED JALAPENOS For the chili:
White beans*, either two 16 ounce cans or one bag of dried beans, cooked through
6 boneless, skinless chicken thighs or comparable amount of ground chicken
Olive oil
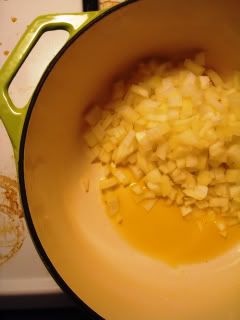
One large onion, diced
4 cloves garlic, minced
Approx. 2 tbs. (or more) ground cumin
Approx. 2 tbs. (or more) ground coriander
1 can corn kernels, drained
32 ounce container chicken stock, or comparable amount of homemade stock
2 tbs. chipotle paste**
Salt, pepper
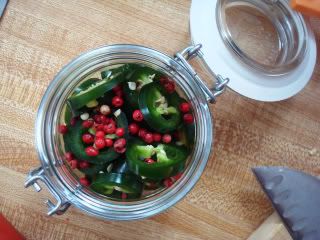
For the pickled jalapenos:One small, clean glass jar
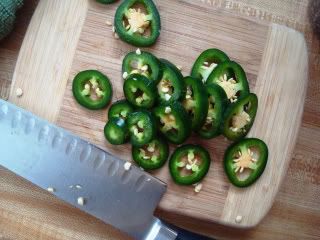
2 jalapenos, seeded or not, sliced into thin rounds
½ cup apple cider vinegar
½ cup water
1 tsp. sugar
2 tsp. salt
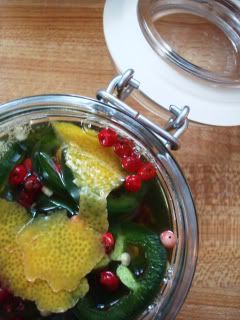
Few pieces of lemon peel
Peppercorns (I used pink)
*I cooked dried white beans for this recipe. Which took up about 4 hours of time. If you’ve got the time, they are less salty than canned beans and cheaper (as if that’s even possible) to boot. Rather than soaking them overnight, because I am truly terrible at planning ahead, I covered them with cold water and brought them to a boil, then turned the burner off and let them soak for an hour. Then I drained and rinsed them, returned them to the pot and covered them again with cold water, brought them to a boil and then turned the heat to a simmer for about 2-3 hours. I then let them just hang on low until I was ready to add them to my chili. The extra time on low allowed them to get creamy and delicious and I think really added to the chili. BUT, if you’re not trynta hear this method because you don’t have a spare four hours to chill at your house, just buy two cans of white beans a/k/a Great Northern Beans a/k/a Cannellini beans, I don’t know why they have more aliases than Puff Daddy, they just do.
**Chipotle peppers in adobo can be found at most specialty grocery stores. They are not easy to find at say, Stop and Shop, but they do have them in the ethnic aisle at Whole Foods. Take the whole can and puree it in your blender or cuisinart and voila, chipotle puree. After using, you can store the paste in your freezer. I have already gotten two uses out of one can of pureed peppers, so saving it is really worthwhile. Especially since the first time I bought it I had to go to two or three stores before I found it. I dislike high maintenance ingredients. So once you have some, preserve it and use it again, it doesn’t lose any of its punch by being frozen and defrosted.
Okay, back to the recipe: originally, I bought the jalapenos to maybe add to the chili itself and then come yesterday morning as I eyed them on my kitchen counter I thought I might be pushing it with too much heat. I like spice but I don’t like atomic. I did want to use them though, so I figured I would take a chance on seeing if my quick pickle recipe would work on them. These are completely optional, as the chili can stand on its own, or you could use a more traditional garnish like some crunched up tortilla chips or say some chopped avocado and a dollop of sour cream.
If you want to make pickled jalapenos but you don’t want them to be super spicy, you could scrape out about half the seeds from the middle of the peppers before slicing your rounds. I did not and they are intensely spicy, but delicious all the same. I made these in the morning, and by dinner time when my chili was done, they were pretty pickle-y tasting but still had a nice crunch.
Combine vinegar, water, salt sugar and lemon peel in a small sauce pan. Bring to a boil and let boil to dissolve sugar and salt. This happens quickly, so stay nearby. Once dissolved, remove the pan from heat and let cool slightly. Meanwhile, slice your jalapenos, discarding the stem end of each pepper and keeping all, or only half of the seeds with the peppers. Remember to take caution when cutting hot peppers. Maybe use gloves and make sure you wash your hands thoroughly afterwards and don’t touch your eyes (or your genitals- like if you go to the bathroom, sickos- true story, happened to someone I know) after cutting and handling hot peppers. How did I end up here at genitals? Okay moving on. Place your sliced peppers in a jar and pour the vinegar mixture over to cover. Add peppercorns and clamp the lid on. Let sit at room temperature, or refrigerate. I think these should keep in the fridge for at least a week or two.
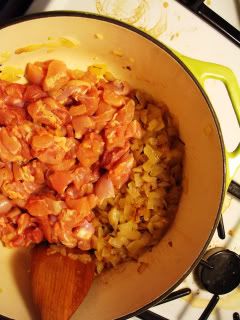
On to the main event. Heat a few tablespoons of olive oil in a large pot or Dutch oven over medium high heat. Add onion and sauté for about 8-10 minutes. Then push the onion over to one side and add your chicken. I used thighs, because I love how they are inexpensive and don’t tend to dry out or get stringy. You could certainly use ground chicken, or skip the chicken altogether, use vegetable stock and make this a vegetarian chili. If using thighs, while your onions are cooking, coarsely chop them into bite sized chunks and then salt and pepper generously. Add chicken to pot, stirring occasionally, browning on all sides. Don’t fret about cooking the chicken through at this point, it will have plenty of time to cook once you add the remainder of your ingredients.
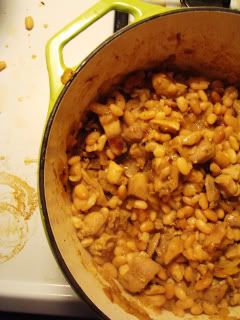
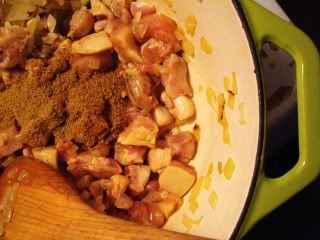
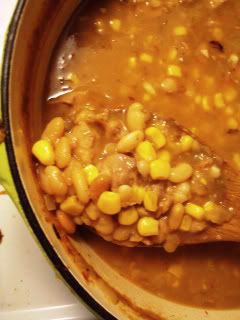
At this point, you can add the garlic, cumin, coriander and some salt and pepper. As for the amounts on the spices, I would venture to guess I used about 2 heaping tablespoons of both the cumin and coriander. I used my palm, so exact measurements I’m not sure. So, uh, a palm full of each. And then a dash more after a taste test, stir everything together then add the beans, stock, corn and chipotle paste. Let the whole mixture come to a light boil and then turn the heat down to medium or medium low and let it hang out for a while. You could probably serve it immediately; I let mine simmer for about 40 minutes, before turning it down just to low until I was ready to eat it.

Serve with a sprinkle of shredded cheese and a couple pickled jalapenos. I can’t wait to find out what it tastes like today. Last night it was really good, but you know all soup and soup like things get better after a day or two in the fridge.
For a more hands off version of this recipe, I’m pretty sure you could make the whole shebang in your Crock Pot. I’m not sure what the setting or the time would be but take a look around the internet and see. If you find a chili recipe for the slow cooker, just use their suggestions. If I were making this in my Crock I would brown the chicken and onions first to add that extra layer of flavor, and then put everything into the bowl of my cooker and let it work its magic while I was at work or out sledding or something.