Thursday, January 26, 2012

low maintenance

Photobucket

You can add cauliflower to the list of things I was decidedly “not into” growing up. Along with most other vegetables and pretty much any food that wasn’t a chicken finger. I am so glad that my taste buds have matured with age (even if my sense of humor hasn’t).

Photobucket

In the winter, it’s tough to get psyched about vegetables like you can in spring or summer. And I am at a ahem, dietary point where I needed to be amped up on veg. One particular specimen that I’m glad to have welcomed into my repertoire is cauliflower and I’m really glad I did. It’s dense and satisfying and needs very little done to it to make it into a tasty side dish, or a creamy soup.
Photobucket

This particular soup is absolutely perfect mid-winter food. Hearty, thick and warm, but fairly low calorie and low maintenance in terms of preparation. I thought it might be a little “one note” in terms of flavor so I jazzed the finished product up with a bright Sun-dried Tomato Tapenade and a sprinkle of parmesan cheese.

Photobucket

SLOW ROASTED CAULIFLOWER SOUP with
SUN-DRIED TOMATO TAPENADE


One head cauliflower
2 large shallots
3 cloves garlic
Butter
Olive oil
Milk or half and half (optional)
Salt and pepper
Chicken or vegetable stock (32 oz., or about three cups)

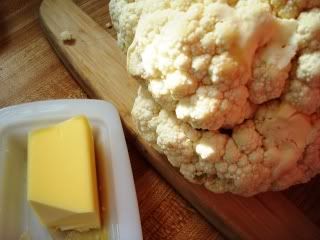
Preheat oven to 400 degrees. Use a large knife to trim off the stem and green leaves of your cauliflower, but keep the head whole. Take a few small pats of butter and smoosh it into the cauliflower; then roast for 1 ½ hours or until a knife cuts into the middle of the head with no resistance. I tented foil over mine to prevent it from getting too brown. It still got a bit of color, but not too much. I didn’t want the resulting soup to be brown, because letsbeserious, who wants brown soup?

Photobucket

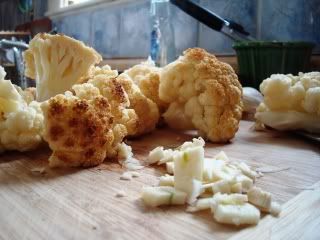
Once your cauliflower is roasted through, remove it from the oven and let it cool slightly before chopping into large chunks. If it’s nice and roasted, it will pretty much fall apart at the sight of your knife. In a large Dutch oven over medium-high heat, warm a generous drizzle of olive oil and a pat of butter. Mince shallots and add to pan, sautéing until translucent and fragrant. Add garlic, adjust the heat down just a bit so it doesn’t scorch and let cook another minute. Add your cauliflower to the pot and pour the stock in to cover. Turn the heat up a touch, add a generous amount of salt and pepper and let simmer for 10 minutes so the flavors combine.

Photobucket

Reduce heat to low and puree the solids into the stock using an immersion blender. If you do not have an immersion blender: puree your soup in batches in a blender, being careful not to over-fill it, because hot liquids expand. Once pureed, return the soup to your pot and pour in a splash of half and half and a pat of butter to thicken a bit. Season to taste with more salt and pepper.
Photobucket

Sun-dried Tomato Tapenade

½ cup sun-dried tomatoes, coarsely chopped
2 tsp. olive oil
1 tsp. sherry vinegar
Salt, pepper
Pinch of sugar

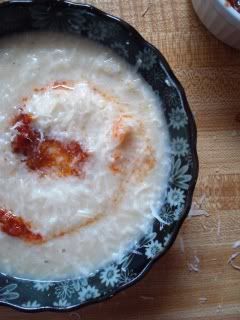
Combine all ingredients in a blender or small capacity food processor. Pulse until it becomes a thick dressing. Can keep refrigerated for a week. I originally made this as a salad dressing a few days prior to making the soup. By the time soup day rolled around it had thickened a bit to be less like a dressing and more like a tapenade. I swirled it into the hot soup and the brightness of sun-dried tomato and sherry vinegar was just perfect with the creamy soup.
Photobucket

Makes approximately 5 servings. Top hot soup with a swirl of tapenade and grated some parmesan cheese. This soup sticks to the ribs and is filling, but has very little fat (and can be made completely dairy free if you’re into that sort of thing- just skip the butter and half and half). A perfect creamy winter soup for lunch or dinner. Pair with a simple green salad and some crusty bread to bulk it up into a full meal.

Photobucket

Creative Commons License

Thursday, January 19, 2012

photographs, nut butter, metaphors

Photobucket

When I was growing up the wall next to our staircase was covered in framed family photos. Not unlike anyone else’s stairway I would presume. One photo in particular was the only professionally posed photo that my family had ever sat down for. It was taken, after hours, in the Cole School gymnasium on a week night in the middle of the winter.

Photobucket

It is your standard family photo, my sister and I perched on blocks, my mother, father and brother artfully arranged at varying heights over our heads. Some of us are smiling; some of us are making a European- style serious face. The only thing different about this photo is the twenty-something man seated next to my mother, holding her hand. His name is Brian and he was a former student of my dad’s and he was, at the time of the photo, living in a U-Haul in our driveway and at times crashing on our couch. My parents, never lacking for sense of humor, thought it would be completely hilarious to have Brian not only come to our family photo shoot but have him tenderly hold my mom’s hand. Like him and my dad were some kind of brother husbands or he was our eldest half brother. I can’t remember what life circumstances brought him to our cat-hair covered couch; and, having grown up in a house with an open door policy when it came to guests, didn’t think much of it at the time. I was six years old, I had a cat named Ashley, I enjoyed the literary works of the Berenstain Bears and a dude named Brian lived in my driveway. It was the way it was. I didn’t know normal looked anything different from this. I was after all in the same household where a guy nicknamed Space dug an eleven foot hole in the woods next to our driveway in an attempt to make an off the grid underground-shelter-cum-paintball-lair. I should mention he did this not only with my dad’s consent, but assistance and outright enthusiasm.

Photobucket

Years later when I was in high school my friend Becky was over looking at the family photo wall and she was all “Jess did you guys have a foreign exchange student? Who is this dude holding your mom’s hand?” I started to explain that he was just a friend of my dad’s who lived in our driveway for a while. As I explained the history of how Brian made it into our family photograph I realized the image itself was like a metaphor for my entire childhood.

Photobucket

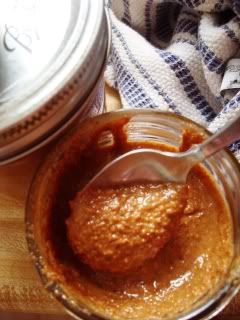
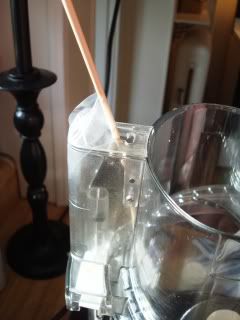
So here I was again today thinking about metaphors as I prepared this Coconut Almond butter in my decidedly jury-rigged Cuisinart. About how the way we do things often illustrates our approach to the world at large. In order to trick the safety switch on the top of my food processor into thinking the cover is on the column, I wedge a kitchen knife into it and then cover the opening at the top with a dish towel to keep whatever I’m pulsing from spritzing out all over my face. Today, because I need to run the processor for upwards of ten minutes, I have scotch taped a barbecue skewer in place to hold the switch. It looks awkward and little ridiculous, but it works for me.

Photobucket

Sure, I could easily go online and order the twenty dollar part that would make all of this rigging unnecessary and ultimately, make my life a little bit easier. Just like my parents could have had a “no dudes living in our driveway” policy while their kids were growing up. Yeah, it might have been slightly more stable and traditional. Smarter even. But where’s the fun in that?

Photobucket

COCONUT ALMOND BUTTER

Almonds
Sweetened, flaked coconut (or unsweetened if you can find it)
Cinnamon
Honey (optional)

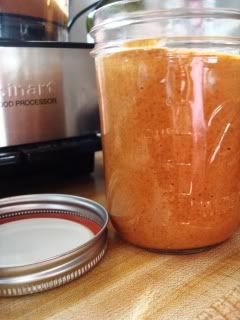
Here I used equal parts almonds and coconut. You can measure it out if you need to. If I had to guess, it was probably about two cups of each, which yielded me one small and one large Ball jar of finished Coconut Almond Butter.

Photobucket

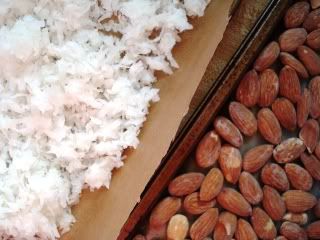
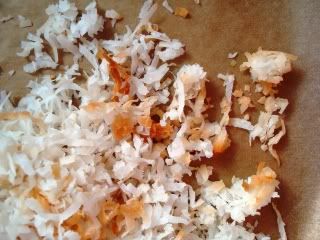
Heat oven to 325. Spread almonds in one layer on a baking sheet. Line another cookie sheet with parchment paper and spread a thin layer of coconut flakes. Send both pans to the oven, stirring occasionally until toasted (about 10 minutes in my oven). Parts of the coconut will be golden brown and the nuts will be fragrant.

Photobucket

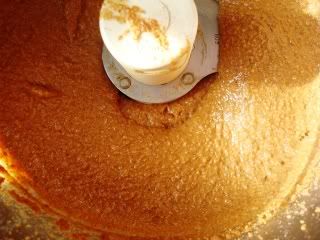
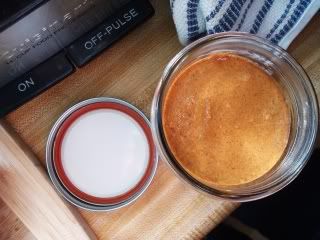
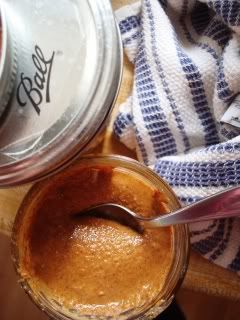
Remove from oven and let cool slightly. Add coconut to the bowl of a food processor and process for quite a while until the flakes are pulverized. You can continue to pulse until the coconut becomes soupy, liquid coconut butter, but since I was adding the almonds, I didn’t think it was necessary. Add the almonds and process until it starts looking like a slightly thicker, more textured version of natural peanut butter. Add a dash of cinnamon and a drizzle of honey and process a bit more. When it has reached a spreadable consistency, scoop into jars, label and date.

Photobucket

Perfect for whole grain toast topped with sliced banana. Or stirred into oatmeal. Or in a breakfast smoothie. Or right off the spoon.

Photobucket

Creative Commons License

Thursday, January 12, 2012

what works

Photobucket

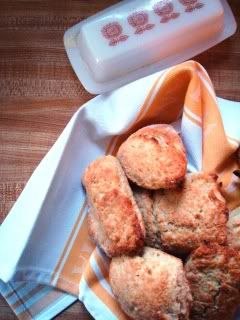
I’m here today to talk about scones. Scones are (in my mind) an often overlooked bakery item. They’re not nostalgic like chocolate chip cookies, indulgent like a slab of cheesecake or hip and trendy like a miniature cherry pie or a new wave Hostess styled cupcake, but dude, look me in the eyes when I say this: scones are freakin’ good.

Photobucket

My mom got me a subscription to Saveur for Christmas and I ate up the whole first issue in one sitting. I like that it’s part travel magazine, part food history, part food-food. And they put all the recipes at the back, which I just kind of dig. It means that I can snip out a one to two paragraph recipe with all the details I need without cutting out text that sprawls onto two pages and a giant photograph of a scallion or a lemon or whatever (I’m looking at you, Bon Appétit).

Photobucket

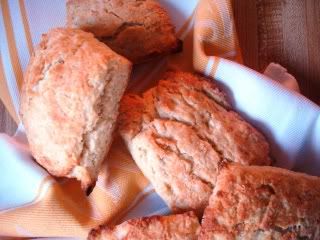
What’s nice about a text only recipe is that it’s simple and it works. Kind of like scones. I had a little extra time on Tuesday afternoon and I didn’t even have to open my pantry door to know that I had all the fixings for these easy scones. There’s really not much to them besides flour and butter and a few other supporting players. The Saveur recipe suggests eating them with jam and clotted cream, but since I am not a fictional British nanny, I have no clotted cream on hand. I ate them with salted butter and a slather of homemade apple butter that a coworker gave me. I paired the scone with some cinnamon tea and I can’t recall a more satisfying snack in recent history. Do yourself a favor and battle back against these chilly grey January days by rustling up a batch of warm scones and making a nice cup of tea. It works.

Photobucket

SIMPLE SCONES
(from Saveur)

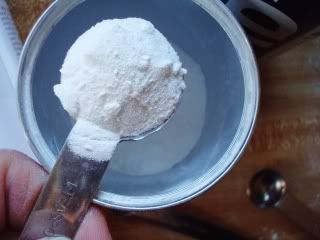
5 cups flour
½ cup sugar
5 tsp. baking powder
2½ tsp. kosher salt
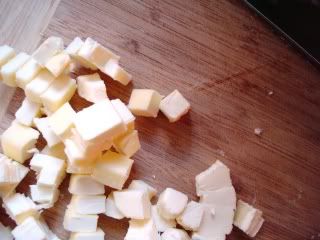
14 tbsp. unsalted butter, cubed and chilled
2 cups milk
Salted butter, jam, and clotted cream, for serving

Preheat oven to 450. Whisk together flour, sugar, baking powder, and salt in a bowl. Add butter and rub into dry ingredients with your fingers until crumbles form (I always see the term “pea sized” used to describe when it’s done, but I’ve never quite achieved that myself; what I do is rub together until all the large chunks of butter have whittled down a bit and the whole bowl of flour smells real buttery). Stir in milk until dough forms.

Photobucket

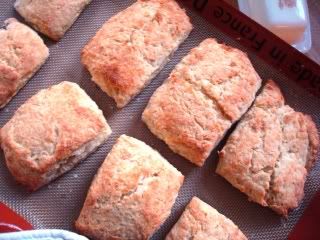
Transfer to a heavily floured work surface and pat into a square that’s approximately an inch thick; cut that square into 16 smaller squares. Using a floured spatula, transfer squares to a baking sheet lined with parchment paper or a Silpat liner; bake until golden brown, about 25 minutes (when I halved the recipe*) cooking time was about 8 minutes less, so be sure to check on them. Serve warm with butter and jam, or maybe even a drizzle of honey.

Photobucket

*This recipe makes 16 scones. Since I didn’t think having 16 buttery scones around the house while I’m trying to eat healthy was a good idea, I halved the recipe right down the middle. It yielded 8. I enjoyed one out of the oven, one for breakfast the next day and then smartly took the remaining scones to work and doled them out to coworkers.

Photobucket

Perfect for brunch: (a tip that is partly from each of my two fave blogs Orangette and Smitten Kitchen) many scone recipes bake up even better when you freeze the scones before baking. If you are hosting people for brunch, or just want to jazz up your Sunday breakfast, make a batch of these on Saturday and freeze the separated scones overnight. In the morning pop the frozen scones right in the oven and wow everyone with fresh, hot baked goods, with little effort required.

Photobucket

Creative Commons License

Sunday, January 8, 2012

time to get radical

Photobucket

I’ve been wearing my fair share of elastic waist pants recently. There is a great danger in wearing leggings, tights and/or jeggings (not that I own jeggings). You eat a lot without noticing that your pants are constricting on your body. This is what’s good about jeans, they don’t move with your waistline expansion. Sure, if you slam back a burrito your skin ends up looking like a relief map of the Andes when you remove your constricting pants, but at least you’re not ignoring the constriction all together. And while I’d like to blame my post holiday bloat on leggings-related over eating, I have no one to blame but myself. From November through New Year’s, I repeatedly abused my body with sugar cookies, champagne and prime rib. Don’t get me wrong, it was a good time. But it’s time to get radical.

Photobucket

Now you may or may not know that I used to be fat (I can’t believe that MTV show stole my phrase) and I’m not saying I’ve undone years of hard work through one indulgent holiday period, but I am feeling the high fat, high sugar, wine-is-a-food-group style eating I have been doing. It’s time to get radical. I need to get my body moving and increase my vegetable intake tenfold.

Photobucket

So that is why, even though it is completely cliché to lead off the New Year with a broth based soup chock full of greens, I am sharing this recipe here. It’s not going to win me any friends, it’s certainly not a contender for the most beautiful food I’ve ever eaten, but it is super detoxifying-ly healthy. Give it a try if you’re into that sort of thing. If you’re not into that sort of thing, I’m probably going to make a nice, tasty baked good on the next go ‘round, so I’ll see you then. Happy New Year. One of my resolutions is to stop being such a neglectful blog mom. So hopefully we’ll be seeing lots more of each other in 2012.

Photobucket

HERB, CHARD and FETA SOUP
(From Bon Appétit)

2 tablespoons olive oil
1 large onion, coarsely chopped
2 garlic cloves, crushed
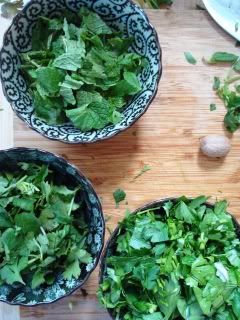
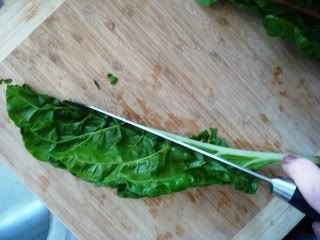
1 pound Swiss chard leaves (center ribs and stems removed) or spinach, coarsely chopped (about 10 cups)
3 1/2 cups vegetable broth
1 cup coarsely chopped flat-leaf parsley
1/2 cup coarsely chopped fresh cilantro
1/4 cup fresh mint leaves
1 tablespoon dried mint
1 teaspoon freshly grated nutmeg
1 tablespoon fresh lemon juice
Kosher salt and freshly ground black pepper

GARNISHES

5 ounces plain Greek-style yogurt (about 1/2 cup)
1/2 cup mixed chopped herbs (such as parsley, cilantro, and mint), divided
4 ounces feta, crumbled, divided
Kosher salt and freshly ground black pepper
Fresh lemon juice (optional)
Olive oil (optional)

Photobucket

Heat oil in a large saucepan over medium heat. Add onion and garlic and cook, stirring often, until translucent and soft (do not brown), 7–8 minutes. Stir in chard, broth, parsley, cilantro, fresh and dried mint, and nutmeg. Bring to a boil, reduce heat, and simmer, stirring occasionally, until chard is tender, about 10 minutes. Stir in lemon juice and season to taste with salt and pepper. Working in batches, purée soup in a blender until smooth. Return to pan. Alternately, puree soup directly in the pot with an immersion blender. If you don’t own one of these by now, I’m not doing my job.

Photobucket

Place 1/3 of yogurt in a medium bowl. Add 1/2 cup warm soup; whisk until smooth. Repeat process twice more, adding a total of 1 cup more soup. Whisk yogurt mixture into soup in saucepan. Stir 1/4 cup herbs and half of feta into soup. Season to taste with salt, pepper, and lemon juice, if desired. Ladle soup into bowls and garnish with remaining 1/4 cup herbs and 2 oz. feta. Drizzle with oil, if desired.

Photobucket

Creative Commons License
 
Creative Commons License
This work is licensed under a Creative Commons Attribution-Noncommercial-No Derivative Works 3.0 Unported License.