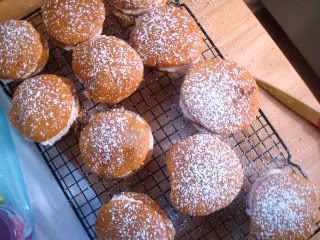
‘Memba the Newlywed Show? And the host would always ask “where’s the strangest place that you’ve made whoopie?” and then the studio audience would go “woooooo” and the newlyweds would blush and answer the question and then one time that one guy that said “in the rear?” and it made it onto blooper reels for eternity? Well, this past weekend I made whoopie in the kitchen (studio audience woo) ba dump bah ching! I made whoopie in broad daylight in my kitchen and I made it all by myself. Hey oh! Alright, this is getting gross. It’s just that, I’m a 30 year old woman with the sense of humor of an 11 year old boy and anything that I can even remotely double entendre to death, well, I will.

So popular tradition says that whoopie pies are a “New England phenomenon” (seriously get a load of this unauthorized history of whoopie pies. I love the internet) and word on the street is they got their name because when kids would see these delicious treats on sale at a bakery they would holler “whoopie!” Now, as to where the term “making whoopie” came from, I’m going to go out on a limb here and say that it might also have to do with, ahem, exclamations of “whoopie!” but this is unconfirmed. Alright, I’m done. Onto the snack cakes.
This recipe is very simple and straightforward. Trust me, I’m not much of a baker and I wouldn’t lead you astray. However, there were a couple tweaks necessary. Either my oven is well below the displayed temperature or the recipe adapters at Boston Globe are big fat liars, because the original 5-8 minute cooking time was laughably wrong, as were the proportions on how much filling to prepare. I doubled this recipe when I made it, so maybe if you are making just the standard amount (as set forth here), the Globe’s measurements on the filling preparation would be accurate, but to my knowledge, there is no way in hell that ½ cup heavy cream, no matter if it’s beat into creamy oblivion will puff up enough to provide adequate filling for this many whoopie pies. I mean, some things are just mathematical facts. And I am no mathematician (a well documented fact), but I know that whoopie pies with an inadequate pie to whoopie ratio might get you killed in this town, and that’s just a risk that I can’t take.
PUMPKIN WHOOPIE PIES
(found in the Boston Globe, adapted slightly)
For the pies:
1 cup sugar
1/2 cup vegetable oil
2 eggs
1 cup flour
1/4 teaspoon baking soda
1/2 teaspoon baking powder
1 pinch salt
1/2 teaspoon cinnamon
1/3 teaspoon nutmeg powder
1/4 teaspoon ground cloves*
3/4 cup pumpkin puree
For the whoopie:
1 cup heavy cream
2 tablespoon confectioners' sugar
½ teaspoon ground cinnamon

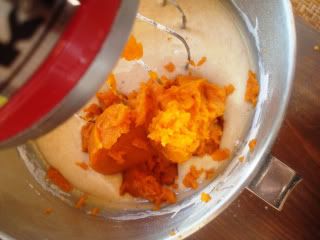
*I didn’t have any clove. Clove is one of those spices so rarely needed that it simply is not in my spice arsenal. If you’ve got it, use it. If not use my substitution: pumpkin pie spice (I used about ½ tsp.).

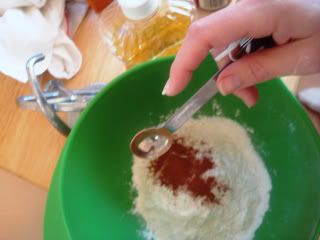
In a large bowl, blend the sugar and oil. Beat in the eggs, one at a time. In a medium bowl, combine the flour, baking soda, baking powder, salt, cinnamon, nutmeg, and pumpkin pie spice. Whisk to blend dry ingredients. Add the flour mixture to the egg mixture. Stir in the pumpkin puree. Cover the bowl and refrigerate for at least 1 hour.
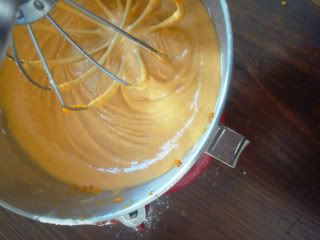
Preheat your oven to 350 degrees. Line 2 baking sheets with parchment paper or a Silpat pan liner. Spoon the dough onto the baking sheets, making an even number of rounds, that are approximately the same size. They will spread a bit, but not dramatically so, so just use your common sense on spacing. Now here is where the original recipe said to bake them for 5-8 minutes, which is just a flat out lie. I baked mine for 8, checked on the progress, found them to still be visibly liquid-like. I baked them another 5 and they had started to set up, but the toothpick test came out sticky. All in all I would say each batch was baked closer to the 15-20 minute mark, but I would just recommend you stay close and check on them after 8 minutes and every few minutes after that. You need them to be cooked through, but you wouldn’t want them to brown, burn or dry out.

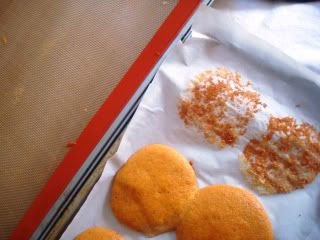
Check for doneness by inserting a toothpick into the middle and when it comes out clean, your pies are done. Remove from oven, let cool on the baking sheets for a few minutes, then place on a cooling rack to cool completely. These are surprisingly very workable and easy. I thought I would have to be super delicate, but they’re a very forgiving cookie. As per sticking, they didn’t stick too badly to the parchment paper, but the batches that I cooked on a silpat liner slid off with ease. If you like to bake, these liners are SO incredibly worth having. I only have one but I need more. Easy clean up, perfect cookies and they are very cute, which means they photograph well, which means a great deal to me. Because I am a dork for aesthetics.
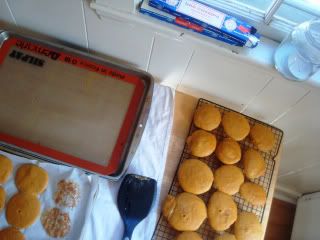
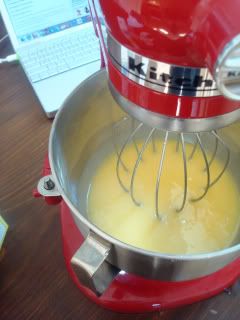
While the pies are cooling, prepare your filling. In an electric mixer, beat the cream until it holds soft peaks; add the sugar and cinnamon and continue beating until the cream forms stiff peaks (hee hee). When the cookies are cool, spoon the cream filling onto one cookie and top with another. You may have to prepare another batch of filling, depending on your proportions here, but with a mixer, it’s very easy to whip up another batch. Once filled, I dusted each side with confectioners’ sugar and layered them with parchment paper to travel. I stored them in the fridge, simply because with the whipped cream filling it seemed to make sense; however, if you opted for a frosting-type filling, room temperature would do just fine.



I need me some silpats! i always tear the parchment the wrong size.
ReplyDeleteYum!!
ReplyDelete