Thursday, May 9, 2013

it's happening

 photo IMG_0311_zpsf62f9d5f.jpg

I’m so into the new Justin Timberlake song that I should probably be arrested; or at the very least, taken into custody. Anyways, now that I got that out of the way I should tell you something: I’m going to Italy. Like, tomorrow. You can’t see this from where you’re sitting but I just did an embarrassing chair dance/ jazz shoulders move that I normally do right when the food comes whenever I’m out to eat. I do believe that to say I am pumped about this trip would be the understatement of my life to this point. I mean, it’s Italy. And I think, I thiiink they might have pretty good food there. So I hope the entire continent of Europe is ready for the aftershock of one jazz shoulder shake after another, because Porky Dickens is going continental.

 photo IMG_0299_zps6f44cec0.jpg

I’m headed out on an incredibly cool eight day educational wine tour with a distributor and importer we work with at the store. This is hands down the most radical “work” opportunity I have ever gotten. I mean when I was an office manager there was this one time the free gift with our Staples order was a pump top coffee pot and I got to keep it. That was pretty cool; but this is slightly better. When I decided to make the move to completely change directions in my career, I never even thought that I would get an opportunity like this. I didn’t even know they existed! I’m totally humbled by the chance and was sincerely so superstitious about it actually happening that I hesitated to even tell most people until I received an email with plane tickets attached. This is happening. Life is happening and I am super pumped about it (high kick!).
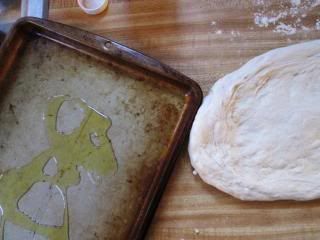
 photo IMG_0298_zps5ca53e42.jpg

So today, I’ll leave you with pizza. Of course pizza! Not just because I love pizza deeply, but also, because it's Italy. I know it's not like I haven't covered pizza ad naseum on here before. I've told you how I like to make it in summer, how sometimes I use a skillet or even fire one up with a salad on top. So I had to ask myself: is there such a thing as too much pizza? And you know, I’ve never been able to answer that question thus far in my life, so I’ll assume the answer is no. I also have happened to have made this or some form thereof at least three times in the past two weeks, so it’s fresh on the brain. This is our go-to weeknight pizza, with a chewy, puffy Sicilian style crust. The process is more about technique and temperature than anything else; this pizza is deceptively simple, yet ridiculously good. So enjoy it my friends, I’m gonna go gain some weight. Ciao!

 photo IMG_0301_zps7d4c2b24.jpg

WEEKNIGHT SICILIAN PIZZA

Store bought or homemade pizza dough
Crushed tomatoes (San Marzano or Pomi are good brands)
Shredded mozzarella cheese
Basil
Salt
Pepper
Garlic powder
Olive oil

 photo IMG_0305_zps28f7b9a2.jpg

The crucial steps to making this pizza delicious all revolve around two themes: temperature and technique. With temperature: take a “more is more” approach, cranking your oven as high as it will possibly go and letting your dough sit at room temperature until its almost so expanded and bubbly that you get worried about it. With technique (i.e. dough wrangling and topping) take a “less is more” approach, you don’t want the whole thing getting bogged down and soggy. The end result will be a puffy, bubbly, chewy, thick-crusted pizza that is light and airy and so easy to eat that two people will very handily crush it in one sitting.

 photo IMG_0306_zpsca153713.jpg

Heat your oven as high as it will go: 500 degrees if you can; 475 if not. If you have a pizza stone, you can feel free to use it here. I do not have one, so I really don’t have a lot of experience with them. While your oven heats, let the dough sit out at room temperature. Once the oven is fully preheated, then begin to prepare your pizza. To stretch the dough: lightly flour your countertop and hands and gently press the ball of dough out into a small circle. Then, take that circle in your hands, hold it vertically and just pass it from hand to hand, letting gravity and the weight of the dough stretch it out. If you’re good and meticulous, you may even end up with a circle, mine always looks a little ragged and oblong. You want the edges to be thicker than the middle and the dough in the middle should be thinned out to about ½ inch or less, but not so thin that there are holes in it. If you do get a hole simply pinch it shut with your fingers. You have to be patient while shaping your pizza: doing it this way the dough won’t tighten up and snap back, but will gently ease out into its shape. Whatever you do, don’t use a rolling pin.

 photo IMG_0307_zps63f270e5.jpg

Grease a cookie sheet with about one tablespoon of olive oil and place the dough on top. Take two or three tablespoons of crushed tomatoes and spread onto the dough in a thin layer. A crucial trick that I read a few years back is to use just unseasoned, uncooked crushed tomatoes, not a cooked sauce. That’s what pizza parlors do and they’re the experts, right? Sprinkle a little bit of garlic powder, salt and pepper on top of the sauce and then top with shredded cheese. Don’t get nuts with the cheese. Remember: less is more. Pop the pizza in your oven and let bake for anywhere from 12 to 18 minutes. Check it periodically. If you had a wood-burning pizza oven, you would have pizza in less than five minutes, but since we’re all using conventional ovens, it takes a bit more time. Ideally your cheese should be melted and bubbling and the crust should be golden brown. Use tongs to peel one edge up and check to make sure the bottom is cooked and remove it when it looks ready. Scatter torn basil leaves on top and devour immediately, maybe with a salad if you're feeling virtuous and definitely with a cold beer.

Top with whatever else you would like, just don’t get crazy heavy-handed with the toppings. Some of my favorite go-tos: sautéed mushrooms and onions; sliced kalamata olives; sliced banana peppers; or, swap the sauce for basil pesto and top with blanched broccoli rabe if you want to get funky with it.

 photo IMG_0309_zpsab4f078e.jpg

Creative Commons License

Thursday, April 25, 2013

a pretty nice time

 photo IMG_0267_zps0b9c6e3b.jpg

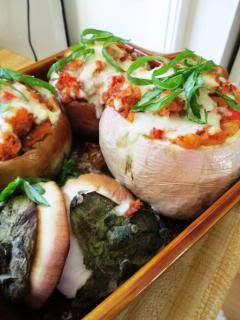
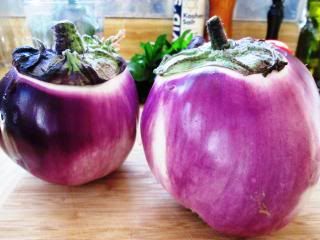
This happens to me a lot because I work in a fancy grocery store. I see something in the produce department, while I’m rattling by with a bunch of empty wine boxes on my cart, and it lodges itself into my creative culinary subconscious, because it is simply too adorable not to cook. Such is the case with these Sicilian eggplants. Up until last Tuesday my favorite small thing from Sicily was Sophia Petrillo. She still ranks high without a doubt, but these tender, flavorful, sausage and veggie stuffed little globes of yum are holding a serious spot in my heart right now. I guess because they kind of saved me last week, by pulling me away from the news and into the kitchen, offering a very necessary (accidental Salt n Pepa reference and it stays!) reprieve from the mire of last week’s headlines.

 photo IMG_0236_zps0118417b.jpg

I had prepared the bulk of this meal on Tuesday morning, where in the silence of my sunny kitchen, chopping and stirring, blanching and roasting and yes, even doing the dishes, made me feel a little bit of peace on a very sad day. And then later in the week on Thursday night, after I had said my piece, had seen the photos and refreshed the news feed for the millionth time, I shut it all off: TV, facebook, boston.com. All of it (thank god, because I guess I needed to reserve energy for Friday. Holy shit. Friday. I can’t even believe it still). Then I turned on some music, opened some wine and invited a friend over to eat. And this is what we had. This is a fairly simple dish but it does take a considerable amount of time to prepare. It’s not a throw together dish, but something to make when you’ve really got time to devote to your food. Or maybe you just need a few hours to avoid the TV.

 photo IMG_0237_zps9c7658c6.jpg

TWICE BAKED, SAUSAGE STUFFED SICILIAN EGGPLANT

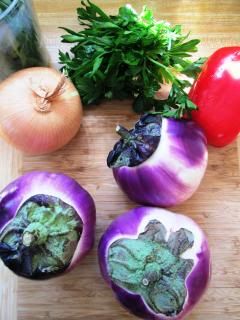
3-4 Sicilian eggplant (or equal amount graffiti or Japanese eggplant)
Olive oil (approx. ¼ cup, divided)
2 links sweet Italian sausage
1 large onion, finely chopped
1 red pepper, finely chopped
3 cloves garlic, minced
½ cup dry white wine (such as Sauvignon Blanc) (optional) 
¾ cup pureed tomatoes (I like Poma brand)
Pinch crushed red pepper
Salt
Pepper

1 cup cubed day old bread
¾ cup milk
¼ cup parmesan cheese
¼ cup finely chopped fresh flat leaf Italian parsley
¾ cup shredded mozzarella cheese

 Basil for serving (optional)

 photo IMG_0239_zpsc6934de1.jpg

Bring a large pot of water to boil over high heat. Heat about two tablespoons of oil in a large skillet over medium heat. Squeeze sausage out of casings and into pan; brown, breaking up into smaller chunks with a wooden spoon. While the sausage browns and your water heats prep your vegetables:

 photo IMG_0240_zps430f2be2.jpg

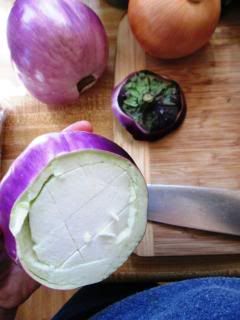
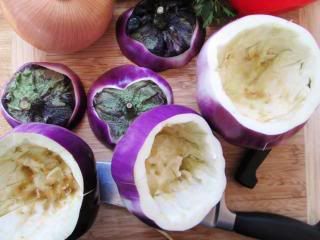
Use a large knife to cut a “lid” off of your eggplant; then working carefully, edge a paring knife down into the meat of each eggplant. Score slices vertically and then horizontally down and use a large tablespoon to scoop down into the center of each eggplant, removing the flesh in ragged chunks. Reserve the eggplant flesh for use in your stuffing. You’ll want about a ½-¾ inch rim around the edge of each eggplant. Prepare the remainder of your veggies and finely chop the reserved eggplant, checking your sausage periodically for a stir.

 photo IMG_0243_zps2cc5de58.jpg

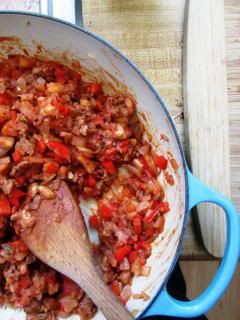
Once the sausage is sufficiently browned, remove from pan, chop through with your knife and set aside. If needed, add a few more tablespoons of oil to your skillet and then add onions and red pepper, sautéing together for a minute or two, until fragrant. Add eggplant and turn heat to high. Pour in wine, if using, and boil until the wine is reduced, scraping the bottom of the pan to free any browned bits of sausage or onion that are stuck (this should take just a few minutes, maybe 4-5). Reduce heat back to medium; add garlic, crushed red pepper, tomato puree, sausage and a generous shake of salt and pepper. Set to simmer, cover and let cook; stirring occasionally, until all the vegetables are tender: about 15 minutes.

 photo IMG_0246_zpsefd77d8a.jpg

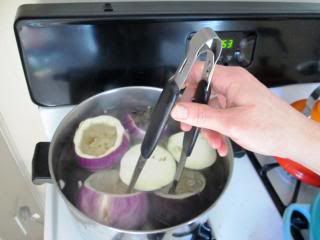
While your vegetable mixture simmers, blanch the eggplant shells. Salt boiling water generously, with about a handful of salt, drop the eggplant shells in, using tongs to submerge them (they float!). Blanch for about 2 minutes and then remove and set to drain on towels. At this point you might get sad because they have turned from a beautiful lilac purple to a sad brown/pink color; but console yourself with the knowledge that their color would have turned at some point or another during the cooking process.

 photo IMG_0251_zps118513f2.jpg

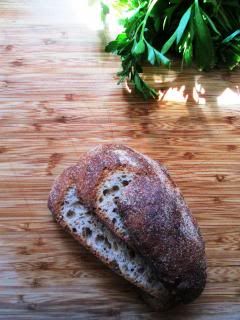
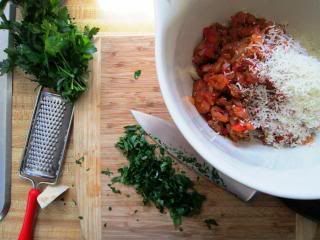
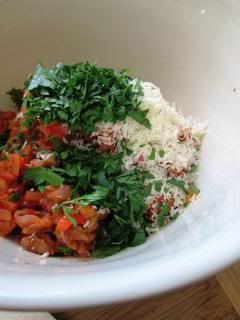
Once your vegetable-sausage mixture is cooked through, remove from heat and set aside to cool. Place the bread crumbs into a small bowl and pour the milk over to absorb. In a large bowl, combine the cooled veggie-sausage mixture with the parsley, parmesan cheese and finally your bread crumbs, squeezing out any excess milk from the crumbs before adding. Salt and pepper and toss together with your hands to combine.

 photo IMG_0252_zps14956771.jpg

Coat the bottom of a small baking dish with a bit of olive oil and then use a barbecue brush or your fingers to paint each eggplant shell with a nice slick of oil, both inside and out. Nestle the shells close together in your pan and fill each with a generous pile of stuffing. Top the stuffed ‘plants with shredded mozzarella. At this point in time, you have two options to choose from. The first option, which is what I did, is to essentially twice bake the stuffed eggplant. I’m not sure if this is entirely necessary but sweet mother, it is delicious, so I’m suggesting it here. If you think that baking a simple dish not once but twice is straight crazy and you’re like “Jess, ain’t nobody got time for that”, please proceed to option 2.

 photo IMG_0254_zps937b0c61.jpg

Option 1: Cover pan tightly with foil and set to bake in a 400 degree oven for 40 minutes. Remove pan, let cool and store in the fridge until you’re ready to serve, later that day, the next day; or, in my case, two days later. I would not advise waiting over three days, but speaking from experience can tell you that two days in the fridge didn’t hurt them a bit. When ready to serve: bake in a 375 degree oven for one hour, tightly wrapped in foil. Remove foil, and set pan under broiler to brown and melt cheese on top, for about 2-3 minutes. Scatter fresh chopped basil on top, if using. Serve immediately with a mixed green salad, or a side of pasta in tomato sauce.

 photo IMG_0257_zps8bf7bc9f.jpg

Option 2: Cover pan tightly with foil and bake in a 400 degree oven for one hour. Remove foil and broil, 2-3 minutes until cheese on top is browned and bubbling. Scatter fresh chopped basil on top, if using. Serve immediately, perhaps with one or both of the sides suggested above.

 photo IMG_0262_zps9ea44254.jpg

Extra filling and what to do with it: I ended up with quite a bit of extra filling and my guess is you will too. In the interest of not wasting this goodness I rolled them into very loose, squishy meatballs and set them on a parchment lined baking sheet and popped them into my already heated 400 degree oven. They only took about 10 minutes before they were deeply browned. They were a little loose and a little rustic looking, but I tossed a few of them on some lightly dressed arugula for a really nice salad. The next day for lunch I heated a couple of these little hockey pucks and had them on toasted bread with crumbled goat cheese, a few leaves of basil and some arugula and that was a pretty nice time as well.

 photo IMG_0264_zps839e8fd8.jpg

Creative Commons License

Thursday, April 18, 2013

take away

 photo 085_zpsa71081d2.jpg

The finish line of the Boston Marathon is about two blocks from my favorite yoga studio, which is about as close as I get to going to church. I head in two mornings a week, roll out my mat and reset. My practice is tremendously important to me; it is the one way I know to recalibrate every part of myself: physical, emotional, mental. This morning was no different and I needed to be there a lot. The city itself was alive with people, headed to work, grabbing coffee and, as always, jaywalking in front of my car as I edged around the corner from Berkeley Street on to Boylston.

 photo 067_zps51b407a2.jpg

I have struggled a bit over the past few days on what to say about what happened on Monday here. After all, this is just a simple spot where I share photos of my lunch and maybe a couple self deprecating jokes or funny stories; hardly the place you would look to seek words of comfort or wisdom at a time when the world stops making sense. Besides, everyone that knows me knows that I am the world’s biggest cry baby and nobody ever looks to be soothed by the person crying the hardest. After all, they might get boogies on them during the hug.

 photo 554_zpse88f49a7.jpg

But as my most favorite instructor said this morning, echoing my sentiments more eloquently than I ever could, it would feel fairly negligent to ignore what happened on Monday. So I won’t. But I’m not going to try to offer advice on how to make sense of the senseless or prove how much I love my town (I don’t have any, anyways (do you?); and believe me: I do very much). I’m not going to even attempt to pretend that I could possibly say anything as immensely good hearted and necessary as this, or even try and be as perfectly appropriately funny as this.

 photo 1134_zps3ae2cf5a.jpg

Instead I will just say that among the horrendous images that I’ve seen this week I’ve noticed a lot of one thing in particular: people hugging, clinging to each other, offering everything they possibly could to comfort someone else. Because when the shit hits the fan, we turn to each other, we don’t turn our backs. Not just people from Boston, but human BEINGS. We’re so much better than we even think we can be, so much stronger and nicer and more honest. And this has been thematic in most of the things that I’ve read this week. Horrible things happen all over the world, every day to people who don’t deserve it. FACT. But in the face of this we have to choose to be good to one another, not just in the aftershock of unspeakable violence, but in line at the grocery store. So while it goes without saying that I am sad about Marathon Monday and I am grieving for all the lives traumatized, gravely injured or cut way too short, I really want to take away from this a renewed sense of faith in people’s innate goodness. And next week I promise, I’ll get right back to baked stuffed eggplant and fart jokes.
Creative Commons License

Tuesday, April 9, 2013

rocky mountain high

 photo IMG_0207_zps84827322.jpg

If you’ve been hanging around here much it should not surprise you to know that I still think about a burrito from 1997. The burrito in question was from Big City Burrito in Fort Collins, Colorado and I don’t know if it was the expertise of the establishment or the crisp, Rocky Mountain Air that made it so memorable. The shocking thing is that it wasn’t even MY burrito. It was my sister’s and I only got one bite; but that bite lodged itself into my subconscious only to be unearthed 16 years later in a small kitchen in Quincy, Massachusetts.

 photo IMG_0209_zps8a94bb3f.jpg

At the time, my sister was a vegetarian so in lieu of carnitas or pulled chicken her burrito was loaded with garlicky wilted spinach and crispy roasted potatoes. At the young age of 17, even though I only ate a very limited number of (mostly) animal-based food groups, with that one bite I knew the combo was something special. I mean, potatoes in a burrito!? Why I NEVER! My mind was BLOWN.

 photo IMG_0210_zps3c06535a.jpg

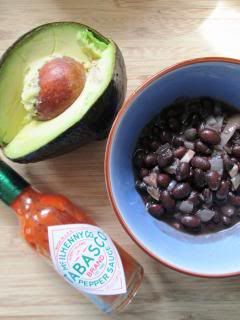
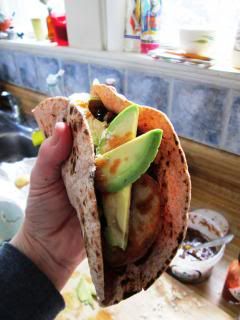
So it’s no wonder the memory of that burrito came back into my brain, on a Wednesday evening in late winter when I found myself without much in the fridge beside tortillas, a big bunch of Swiss chard and some leftover roasted potatoes. Since we always have black beans and avocados in the house this Veggie Taco spread is what came together. The resulting meal was so tasty that it has assumed a permanent position in our weeknight dinner repertoire. Everybody can dig on taco night, here’s a tasty, healthier way to hit that Mexican food craving right where it counts.

 photo IMG_0211_zpsca7d88c2.jpg

VEGGIE TACOS 
a/k/a TACOS del BENSON

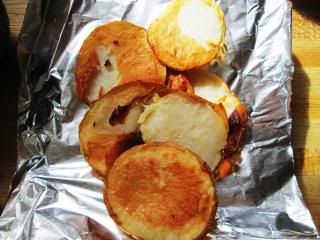
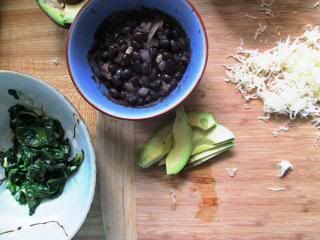
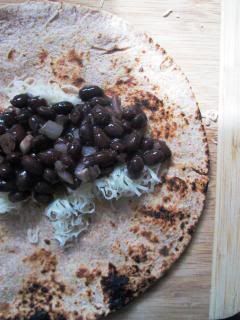
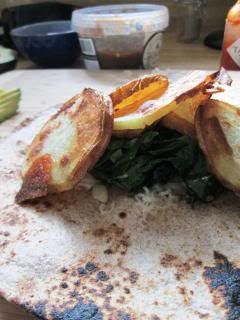
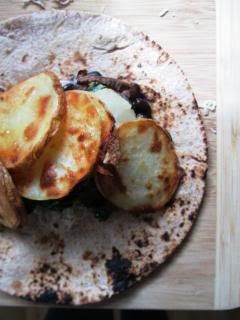
Everything for these tasty tacos comes together in the time it takes to roast the potatoes. You can slice the potatoes any way you choose, I prefer to cut them into thin disks, so they end up like fat potato chips. These are fairly messy, but not impossible to eat. Have napkins handy and for best results, layer ingredients as follows:

Whole wheat tortillas
Shredded cheese (Jack or Cheddar works)
Quick Simmered Black Beans
Crispy Roasted Potatoes
Garlicky Swiss Chard (easily sub spinach or kale here)
1 avocado, thinly sliced
Salsa
Hot Sauce

 photo IMG_0213_zpsc3e52563.jpg

While the potatoes roast and the black beans simmer: prep the chard, slice and set out the avocado, grate the cheese and set the table. Wilt the chard, or whatever greens you’re using just before serving. To heat your tortillas, you have two options: you can wrap them in aluminum foil and set them in the oven for a few minutes; or, you can toast them abuelita style like I like to do: on an open flame, for just a few moments on either side, almost burning my fingerprints off every time (I think it adds a little something special—an element of danger!). Serve with chips and salsa, a green salad or seasoned rice.
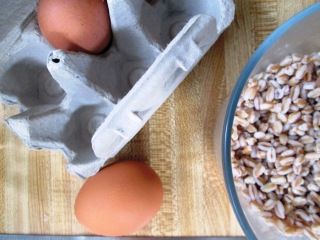
 photo IMG_0214_zps61955d51.jpg

QUICK SIMMERED BLACK BEANS

1 can black beans
½ small onion, minced
1 clove garlic, minced
1 tsp. cumin
Hot sauce
Salt, pepper

Bring all ingredients to a simmer in a small sauce pan. Season to taste with hot sauce, more cumin, salt and pepper, as needed. I think depending on the brand of canned black beans some need a little extra help. Just adjust the seasonings to your liking. These quick simmered black beans are one of my favorite things to toss into a tortilla with some cheese and hot sauce for a supremely messy, five minute burrito.

 photo IMG_0216_zps00d66b5c.jpg

CRISPY CAYENNE ROASTED POTATOES

2 russet potatoes, washed and thinly sliced
Oil, canola or olive
Salt, pepper
Cayenne

Heat oven to 400 degrees. Toss potato slices in olive oil on two baking sheets and sprinkle with salt, pepper and a few small pinches of cayenne. Set to roast for 30 minutes, turning over once about halfway through. Do your best to only open the oven once or twice, this will ensure the taters crisp up real nice.

 photo IMG_0215_zps2b5657fb.jpg

GARLICKY SWISS CHARD

1 bunch Swiss chard, trimmed and chopped
3 cloves garlic, minced
Olive oil

Heat oil in a pan over medium heat. Add garlic and sauté until fragrant, about one minute. Add chard and cook until wilted, about five minutes.

 photo IMG_0219_zps97cf907b.jpg

Serve everything taco bar style, with condiments on the side. Pile the fillings high on blistered tortillas and thank me later. Do not wait 17 years for your first potato-burrito/ potato-taco experience. Double starch is on point.

 photo IMG_0221_zps2a9f63f7.jpg

Creative Commons License

Tuesday, March 26, 2013

aromatherapy

 photo IMG_0206_zps92cdfeba.jpg

I spent far too many years of my young life unnecessarily overlooking, heck, even borderline disliking coconut. And this oversight of my youth, to me it’s just sad. Almost as sad as the amount of time I spent wearing drawstring waist cargo pants in the mid to late 1990s, but not quite that distressing. I have no earthly idea why it took me until my adult years (like the real adult years not 18-26) to come around to what is arguably now (alongside standbys peanut and chocolate) my favorite sweet flavor ever.

 photo IMG_0189_zpscb11de71.jpg

One of the best things about coconut to me is the power of its smell to trigger sense memory. One whiff of that warm nutty scent transports me to afternoons lathered up in sun tanning oil on Humarock beach with my girlfriends getting our leather on. This was, of course, before we all knew better and realized that in addition to potentially getting skin cancer we were also essentially ironing wrinkles into our future faces with this flagrant abuse of our skin. But regardless, the scent of coconut brings me to a deep state of relaxation and a time in my life when the only things I had to worry about was what to get on my turkey sub at lunch (why pickles and mayo of course) and what time my shift at Dribbles started.

 photo IMG_0191_zps12aff315.jpg

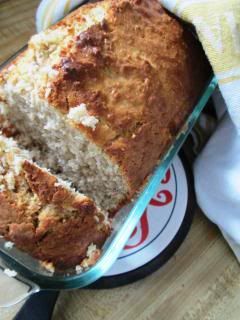
So last week, when I happened across this recipe for a quick loaf of coconut bread, I promptly put the computer down, marched to my kitchen and whipped it together in about 10 minutes. Then, for the next hour, my whole house was progressively filled with the luxurious scent of warm, toasty coconut. It was much needed aromatherapy to the tenth degree on a day in late March where I had awoken at 5:30 a.m. to six inches of snow, which later turned to rain, then to hail, then to rain again. Inside the comfort of my kitchen, despite the disgusting weather outside, life was just beachy.

COCONUT BREAD
(found here)

2 large eggs
1 ¼ cups milk
1 teaspoon vanilla extract
2 ½ cups all-purpose flour
¼ teaspoon salt
2 teaspoons baking powder
2 teaspoons ground cinnamon
1 cup granulated sugar
Approx. 1 ½ cups sweetened flaked coconut
6 tablespoons unsalted butter, melted

Nonstick cooking spray or butter for pan

 photo IMG_0192_zps3435c997.jpg

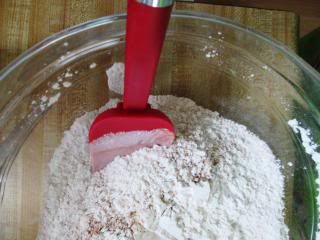
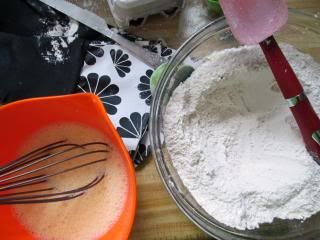
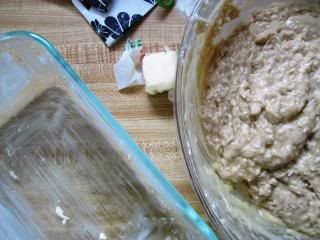
Preheat oven to 350. In a small bowl whisk together the eggs, vanilla and milk. In a large bowl, sift together the flour, salt, baking powder and cinnamon. Add the sugar and coconut and stir together to mix. Make a well in the center and pour the egg mixture in, stir together gently with a rubber spatula until just combined. Add the melted butter and stir together again until just smooth. Be careful not to overmix. This bread is fairly dense as is and if overmixed, methinks would turn into a total coconut brick.

 photo IMG_0193_zpsa831ad12.jpg

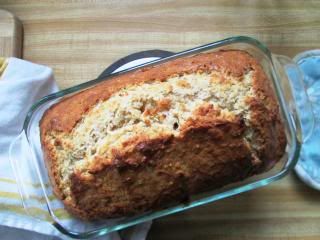
Butter and flour a 9x5 inch loaf pan. Spread batter in and bake until a skewer or knife inserted in comes out clean. Between 1 and 1 ¼ hours. Mine took an hour and ten minutes exactly. My oven runs just slightly cool. Set the timer for an hour and if it’s still wet in the middle check it every five minutes or so until cooked. Let cool before serving.

 photo IMG_0197_zps39d7dbe5.jpg

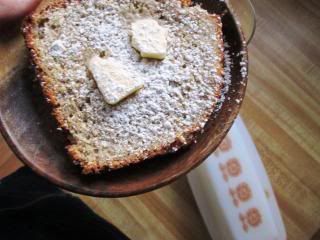
This bread is not overly sweet by any means and mine was even less so due to the fact that I used un-sweetened flaked coconut because that’s all I had on hand. The serving suggestion on SK, to serve toasted with a bit of butter and a dusting of powdered sugar is straight heaven. I ate it every day for breakfast last week with a small bowl of yogurt (for good measure). Just a little touch of salty butter and a light dusting of sweet sugar makes this already yummy bread a totally transcendent breakfast treat.

 photo IMG_0202_zps48c1a28b.jpg

This bread would be a killer addition to a brunch spread or would make an amazing base for a coconut almond sundae. Top a warm slice with a scoop of vanilla ice cream, chopped almonds and hot fudge. Heck, you could even have that for breakfast. You won’t find anyone to judge you for doing that here.

Creative Commons License

Thursday, March 14, 2013

be here now

Photobucket

I hate to complain about the weather. Because really, if we chose another thing that we could possibly have any less control over it would be what the sky is going to do on any given day. We got married outside in late September with not much of a backup plan to speak of. And while September is arguably the nicest month of the year in Massachusetts, it was a slightly risky thing to do. It could have been 50 degrees and cloudy, it could have been unseasonably sweltering but you know what it was? It was f*cking perfect. It was 70 degrees without a cloud in the sky or nary a ripple on the surface of the Atlantic Ocean.

Photobucket

People asked me a LOT in the weeks leading up to the wedding if I was worried about the weather or if I had checked the forecast. I responded the same every time: I can’t control it anyway, so why am I going to stress myself out about it? I’m actually impressed in hindsight at this Zen-ness I had embraced and I know that a lot of that ‘letting go’ mentality was thanks to a devoted and regular yoga practice and a devoted and regular wine drinking practice; and also, the fact that I just really did not want one more iota of information to manage in my overtaxed bridal brain.

Photobucket

So I feel like a traitor to my former Zen self when I admit that I have so had it up to here with this winter. I spent the better part of last Friday morning in a snowstorm induced mini meltdown during which I may or may not have chucked my snow shovel to the ground in frustration once or four times. I mean, get over it, really. Today, yes it is still cold, but the sun will be in the sky until well past 6 o’clock tonight and that, that my friends, is a win for US. This savory bowl of comfort food is a nod to this in between place that March occupies. Not quite yet finished with winter, but still we can see spring ahead. Healthy, practical and jazzed up by a verdant drizzle of deeply green infused oil that is both earthy and bright, it was the perfect lunch for right now.

Photobucket

SAVORY VEGETABLE BROTH with VINEGAR POACHED EGG,
FARRO and PARSLEY SCALLION OIL

1 leek, thinly sliced (white and light green parts only)
2 carrots, peeled and finely diced
1 parsnip, peeled and finely diced
1 small onion, minced
4-5 cloves garlic, minced
1 (32 oz.) container chicken or vegetable stock
1 ½ cups water
Salt
Pepper
Olive oil
1 cup farro or small pasta, prepared according to package directions (optional)

1 egg
White wine or apple cider vinegar

1 small garlic clove, peeled and left whole
½ bunch flat leaf parsley, loosely chopped
2 scallions, chopped

Photobucket

Warm a few tablespoons of olive oil in a Dutch oven over medium heat; add leeks and onion and sauté until fragrant. Add carrots and parsnip to the pot and sauté another few minutes to soften. If it starts to get dry, add another small drizzle of olive oil. Add garlic to the pot and stir together until fragrant (about 1 minute). Pour in chicken stock and 1 cup water, season with a large pinch of salt and plenty of cracked black pepper; bring to a boil then reduce to a simmer and let cook until the root vegetables are cooked through (about 20 minutes). If your broth had reduced substantially, feel free to pour in another ½ cup of water. Test vegetables for doneness and season again, generously, with salt and pepper.

Photobucket

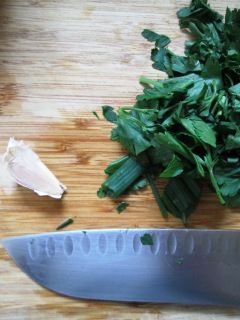
While the stock simmers, prepare the Parsley Scallion Oil: rub the garlic clove all over the inside of a small food processor. This sounds a bit weird but somewhere along my food obsessed travels, I saw someone do this trick with a salad bowl and rather than imparting the bracing, almost hot flavor of raw garlic into your oil, it really just sort of shows the garlic to the product. It’s a little bit coy in that sense. Combine parsley, scallions and ¼ cup olive oil. Top with a large pinch of salt and a few cranks of pepper. Puree this for several minutes, pausing to scrape the bowl down a few times.

Photobucket

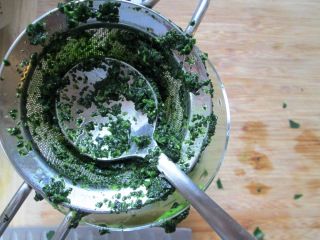
The end result should look like a slightly darker version of your favorite pesto, only even more mashed. Using a small mesh strainer (I have one for cocktails that is perfect here) drain the oil into a small glass or ramekin. Use the back of a soup spoon to press down, releasing more oil. Feel free here to work it a little, leave it to drip, then come back to it and press a bit more. You really only need a small drizzle of the finished product, so don’t stress if you’re not getting more than a few teaspoons. Infused oils like this one are a pretty and sophisticated way to jazz up a dish. I think this particular oil would be so delicious on a piece of poached or broiled white fish or salmon.

Photobucket

To vinegar poach an egg: bring a few cups of water and about 2-3 teaspoons of vinegar to simmer in a small sauce pan. To me, simmering is when the entire bottom of the pan is covered in little air bubbles and the water is steaming steadily; i.e.: almost boiling, but decidedly NOT boiling. Use the handle of a spoon to stir a whirlpool into the water and gently slide your egg into the vortex (side note: Slide Your Egg Into the Vortex would be an excellent R&B song title for baby making). Let the egg simmer for about 3-4 minutes and use a slotted spoon to gently remove it from the water. I like to lift my egg out of the water at the 3 minute mark, jiggle the spoon slightly and see what it looks like. If it’s uber jiggly: slide it back into the water for another minute, you want your whites gently cooked but the yolk nice and gooey.

Photobucket

Mound cooked farro or pasta into the bottom of a wide shallow bowl; spoon the finished vegetable broth over the top and gently nudge your poached egg into the middle of the bowl. Drizzle a few drops of bright green Parsley Scallion Oil on the top and enjoy immediately.

Photobucket

Say, check out all this green and orange. I must be channeling my Irish roots and prepping for St. Patrick's Day. Here's a classic recipe if you want to recreate some yummy pub-style fare at home from the PD archives.

Creative Commons License
 
Creative Commons License
This work is licensed under a Creative Commons Attribution-Noncommercial-No Derivative Works 3.0 Unported License.