Saturday, August 11, 2012

bright as yellow

Photobucket

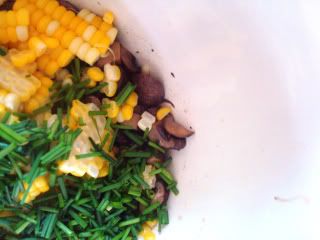
At this time of year, I'm wont to put corn in anything I can feasibly jam it. An ear of fresh local corn is a treat in and of itself. Boiled up with a bit of butter and a lot of salt and pepper there is hardly a more worthy summer side dish that I could choose. I love fresh corn kernels added to pretty much anything, bringing in a bright little burst of sweetness and a bit of texture. What I love about corn is it actually tastes bright, just like it looks- it tastes yellow. And yellow is so fun!

Photobucket

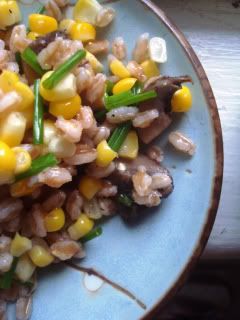
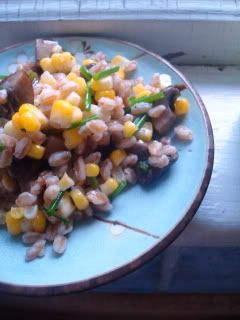
I saw a similar salad made with Israeli cous cous at a Mediterranean sandwich place I like to go to every now and then (if you have a hard time finding farro, feel free to substitute that). Corn, mushrooms, chives: that was it. It sounded so appealing in its simplicity but a little inspired in its choice of ingredients. This is a delightful side dish and I just can’t wait to make up another batch. I wish I had time to do so today.

Photobucket

FARRO SALAD with FRESH CORN,
ROASTED MUSHROOMS and CHIVES

2-3 cups farro, cooked according to package instructions
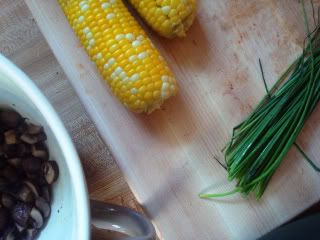
2 ears fresh corn
½ lb. cremini mushrooms, cleaned and diced
1 bunch chives, minced
Juice from one lemon
Olive oil
Red wine vinegar or sherry vinegar
Salt and fresh cracked pepper

Photobucket

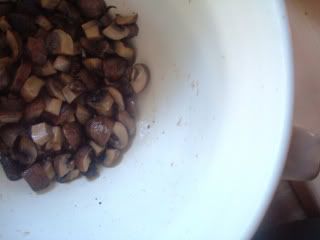
Preheat oven to 400 degrees. Cook farro in boiling salted water, according to package instructions (about 20-25 minutes). While the farro is cooking, clean and stem your mushrooms and cut into equal sized chunks. Toss on a baking sheet with a splash of vinegar and a drizzle of oil, salt and pepper. Set to roast in the oven for about 20-25 minutes.

Photobucket

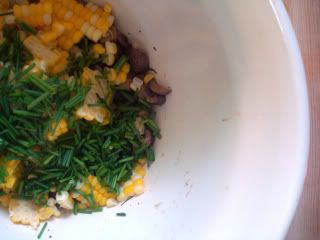
Peel, shuck and cook corn however you choose. You can toss the cobs on the grill, quickly char them over an open flame or do what I did: toss them into the boiling farro water for 7 minutes and then pluck them out. Once the corn is cool, cut the kernels from the cobs and set into a medium sized bowl. When the mushrooms are ready, pull them out and spoon them into the bowl, adding a splash of their accumulated cooking liquid.

Photobucket

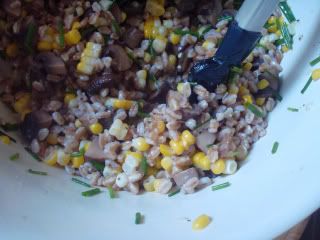
Remove farro from heat, drain and rinse with cold water. Add to your bowl the farro, chives and ½ the lemon juice. Toss together well, add a drizzle of olive oil and a sprinkle of salt and pepper. Taste and adjust seasonings, adding more lemon juice if it seems dry. Serve at room temperature or chilled.

Photobucket

This salad would make an excellent side dish for sandwiches or a healthy accompaniment to grilled chicken or fish. I also love to toss a few spoonfuls on a simple mixed green salad to bulk it up a bit.

Photobucket

Creative Commons License

Wednesday, August 1, 2012

plenty

Photobucket

I’ll spare you the same old boring chit chat as last time about how quickly this summer is going by and just cut to the chase. It’s probably looking like 3 posts a month until I become a human again and cease being a Bride. Until then, spare time willingly co-opted, cooking relatively sparse, when I do show up around this old corner of the internet, I’ll probably be a little less wordy, but still bring plenty of food. I’m sure everyone is fine with that.

Photobucket

And plenty of food is what I’ve got here. This is a “drop off dish” if I’ve ever seen one. A delicious, satisfying casserole that’s perfect for making ahead of time and freezing, or delivering to your friend that just had a baby, or moved, or anyone that’s in need of a nice meal really. And a nice meal it is. Packed with all the best summer vegetables it’s savory and satisfying and sneakily very healthy. I wanted to make a baked pasta inspired by ratatouille to take advantage of all the summer vegetables. This here’s what I ended up with and I must say it came out real nice. Now if you’ll excuse me I have to do a CSI report on the RSVP card which came back with no name but an “X” next to “delightfully accepts.” If this is you and your reading this blog, please identify yourself immediately, there might just be a baked pasta casserole in it for you.

Photobucket

BAKED PASTA with RATATOUILLE SAUCE

1 white or yellow onion, minced
1 small zucchini, quartered and thinly sliced
2 small summer squash, quartered and thinly sliced
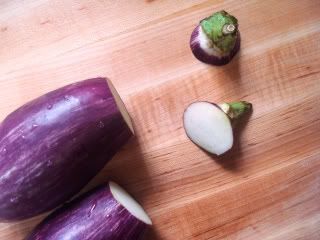
2 Japanese or graffiti eggplant, diced
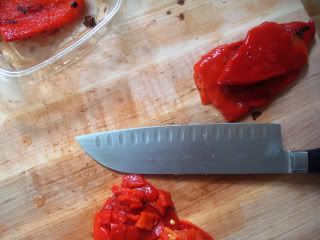
1 jar roasted red peppers, drained and minced
1 tbs. tomato paste
1 small can pureed tomatoes
¼ cup olive oil, divided
1 box dried penne, elbows or cavatappi

3 cloves garlic, minced
3 cloves garlic, peeled and left whole
2-3 sprigs thyme
Salt, pepper
½ tsp. crushed red pepper
1 pinch sugar

Grated parmesan cheese
1 bag shredded mozzarella or Italian style blend
Fresh flat leaf parsley
Fresh basil

Photobucket

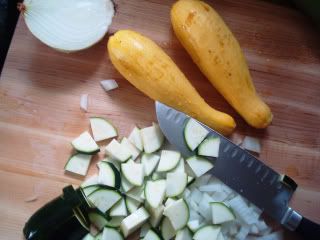
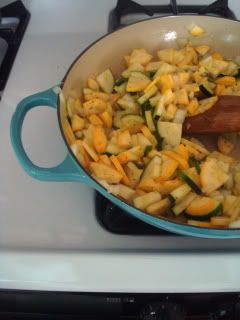
Preheat oven to 400. Heat half of olive oil in a large braising pan or Dutch oven over medium heat. Add onion and sauté until fragrant and translucent, about 5 minutes. While the onion heats, toss your diced eggplant with a generous sprinkle of salt and set in a colander in the sink to drain. Add the summer squash, zucchini and minced garlic to the pan, drizzling in a touch more oil if it seems dry. Salt and pepper and reduce heat to medium-low, continue stirring occasionally. Set a large pot of water to boil on the stove.

Photobucket

Toss eggplant on a cookie sheet with a drizzle of olive oil and plenty of salt and pepper. Set pan to roast in the oven, stirring once or twice, for about 20-25 minutes. While the eggplant roasts, add to your pan the minced roasted red peppers, tomato paste and pureed tomatoes. Add a generous amount of salt, pepper, the crushed red pepper, whole garlic cloves and your thyme sprigs. Bring the heat up so that the mixture comes to a boil then reduce to low and let simmer until the eggplant is finished roasting. Reduce oven heat to 375.

Photobucket

Once the eggplant is done, toss the lot of it right into your pan, stirring everything together. Taste and adjust seasonings. I found mine needed quite a bit of salt and a pinch of sugar because of all the raw vegetables involved. Let the mixture simmer on medium low heat so the flavors can come together while you make the pasta. Just before adding the pasta fish the sprigs of thyme out of the pan and add a bit of fresh chopped basil and parsley, reserving a bit of parsley to garnish on the finished dish.

Photobucket

At this point, your pasta water should be ready to roll: salt the water generously and add pasta. Let the pasta cook for about 5-7 minutes. It will not be fully cooked, but the ends of the pasta should be white.

Photobucket

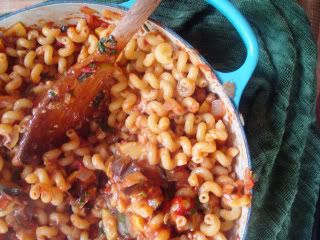
Drain pasta and add to sauce, tossing together (did I mention you need a very large braising pan or Dutchie here?). In addition, add 1/3 of your shredded cheese, toss together well, add the next 1/3 reserving the last of the cheese for sprinkling on top. Lightly oil a baking dish and spoon the pasta mixture in, top with remaining cheese. Set to bake in the oven for about 20-30 minutes until cheese is brown and bubbly. Garnish with fresh chopped parsley and serve with a simple salad for a hearty meal with a deceiving amount of healthy vegetables tucked inside

Photobucket

Creative Commons License

Thursday, July 19, 2012

crisp, cool and crunchy


I have to confess here. I am currently sitting in a Starbucks ticky tapping away on my laptop while I’m writing this. I’m even drinking a green tea. It’s like I hardly even recognize myself any more. I swore on all that is holy that I would never be a Laptop Loiterer working sucking up all the wifi and the best seat (on the couch next to the outlet with the footstool-score!) but truth be told this is Dickens multitasking at its most ridiculous.


I feel as though I am living in a time warp right now. Where I wake up on Monday morning wondering how I will possibly get All The Things done this week and by the time I’m done scratching the sleep out of my eyes it’s Thursday night and I’m like “Say wait a sec., did I post a blog this week? Did I cook anything this week?” So bear with me on my timing this summer. It’s not you, it’s me and it’s the time warp that happens when you need more time but none is forthcoming.


But you know what? It’s sooooo boring to talk about being busy and it’s even boring-er to talk about the weather but hey, speaking of the weather, hot enough for ya?? (I needed a segue) Cooking is for the birds in this kind of heat wave and summer in general is a season that more lends itself more to simple assembly rather than actually cooking. Fortunately, the food of the season cooperates. As I drove home for lunch yesterday afternoon I knew that I needed food and that I needed said food to be crisp, cool and crunchy. But also healthy, because it’s Tuesday and I should at least try to be healthy on Tuesdays, so that I can take down burgers and ice creams on Sundays. This is what’s called a balanced diet.


SUMMER VEGETABLE BRUSCHETTA 
(inspired by this salad)


1 cucumber 
1 bunch radishes
1 or 2 ears fresh corn
Approx. ½ - ¾ cup mixed fresh herbs, I used: basil, chives and mint
½ cup Feta cheese
3-4 tablespoons olive oil
Juice from one lemon
Salt and pepper


Multigrain bread, large slices, or a baguette cut into ½ inch slices* 
1 or 2 peeled garlic cloves 


Store bought hummus (optional)


Peel, quarter lengthwise and slice your cucumber into thin slices. Wash the radishes thoroughly, trim the ends and thinly slice into tiny circles. Cook the corn however you choose and once cooled, cut the kernels from the cob. As always, I choose to char it over an open flame because it takes the least amount of time and tastes great.


Combine all of your veggies in a medium-sized bowl. Trim and chop the herbs and add to bowl as well. I used equal parts chives and basil and then a little bit of mint but really any fresh herbs would work well here and scallions would stand in perfectly for the chives if that happens to be what you have on hand. Likewise, any crisp, fresh raw vegetable would work here, I just happened to want cukes, radish and corn, but you could use fresh green beans, snap peas or carrots even.


Crumble feta on top and drizzle with olive oil, lemon juice and a sprinkle of salt. Grind in a good amount of fresh cracked pepper and toss together to combine. Taste and add a bit more seasoning or lemon juice if necessary.


Cut a multigrain baguette into slices, or use sliced bread that you have on hand. Toast until well browned and while it’s nice and hot rub a clove of garlic over. If you’d like to use the hummus, spread a thin layer on the toast after it’s been rubbed with garlic and spoon the salad on top. If not using, skip this step and spoon the vegetables right onto your garlic toasts. Serve immediately.


Truthfully, I could take or leave the hummus and I’m the type of person that will ALWAYS take the hummus. Seriously, hummus is like currency in our house and we mainline hummus like it’s some sort of serum of eternal youth. And truth be told we DO always get ID’d when we’re together even though we are both at least ten years over the legal age, so maybe there’s something to that. Hummus= eternal youth. The Dickens’ scoop: you heard it here first. ANYWAYS, I’m off track, so I thought maybe this salad would need a little jazzing up, hence, I added hummus to one of my toasts and left the other unhummused. Verdict: it’s seriously delicious either way. The hummus adds a little texture and tang, but without it, the taste of lemon juice and bright herbs really stand out, so it’s totally your call.


*This would make a phenomenal summer appetizer. If I were making it for a crowd I would make small bruschetta toasts. In this case for a lunch main course, I used larger slices of multigrain bread. 

Creative Commons License

Wednesday, July 4, 2012

red, white and rosé

Photobucket

I am, admittedly, a wee bit obsessed with rosé. I will talk about it passionately with anyone who will listen because I am determined that the world know how refreshing and delicious it is (in addition to being so very pretty). Rosé is refreshing and easy to drink but has a touch more complexity than your typical white wine. Not that I don’t like a cold glass of white, I am a Caucasian female: we’re pretty much programmed to pound the stuff. But my warm weather weekends almost always involve a chilled bottle of pretty pink wine (or two).

Photobucket

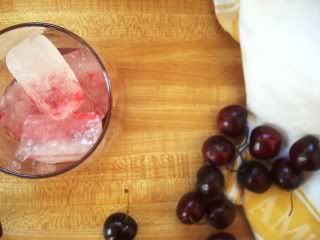
I knew for 4th of July that I wanted to make a punch to: a) use our radical new punch bowl; b) use up the delicious Sweet Cherry Simple Syrup I made last week; and, c) have enough hooch in it to make us sufficiently warm and fuzzy because nothing to me says “Happy Birthday America” like a cool buzz, some smoked meats and some mother loving fireworks. Tonight I plan on having all three and I wish you the same. Happy 4th.

Photobucket

RED, WHITE and ROSE PUNCH

(for one)

½-¾ cup chilled rose wine
Juice from half a lemon
1-2 oz. Sweet Cherry Simple Syrup
Ice
Seltzer

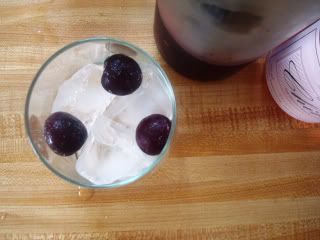
Frozen cherries
Slicced lemons

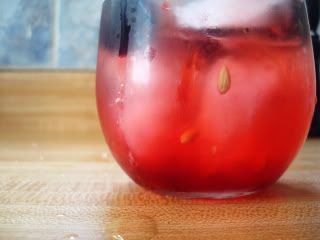
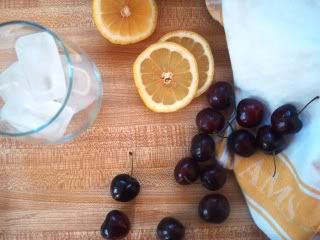
Fill a rocks glass or stem less wine glass with ice. Drizzle in Cherry Syrup, add the lemon juice and rose; stir together to combine well. Top off with seltzer. Garnish with frozen cherries or any other fruit (peaches or strawberries would also taste great). Serve immediately and repeat until feeling sufficiently patriotic.

Photobucket

(for a crowd)

2 bottles chilled rose wine
Juice from 2 lemons
½ - ¾ cup* Sweet Cherry Simple Syrup
1/3 container frozen lemonade concentrate (like Minute Maid)
1 ½ liters seltzer
Frozen cherries, lemon slices, or any other fresh cut fruit for color and garnish

Combine Cherry Syrup, lemon juice, frozen lemonade and rose in a large pitcher or punch bowl; stir together to combine well, add the cherries and any other fruit. Set in the fridge until ready to serve, anywhere from an hour to overnight. When ready, fill pitcher or bowl with ice and top off with seltzer. You can also use less seltzer for a more concentrated punch; or, if you’re a real boozehound use a bottle of Prosecco or Cava instead (no judgment here, I think it’s a swell idea).

*(the amount depends on how sweet you want your finished punch, add it to taste)

Photobucket

Creative Commons License

Thursday, June 28, 2012

sippin' on some syzzurp

Photobucket

There is a song that came out when I was in college called that. It was about people drinking cough syrup to catch a buzz. This post is not about that (sorry to disappoint). I’m all for freedom of expression but I can’t say I would advocate drinking Nyquil to get crunk. That just sounds...unpleasant. That song, however, always made me giggle and forever changed me in that I cannot read, see or think the word “syrup” without nodding my head slightly and rapping “sip sip sippin’ on some syzzurp.” It’s an affliction I’ll live with the rest of my life.

Photobucket 


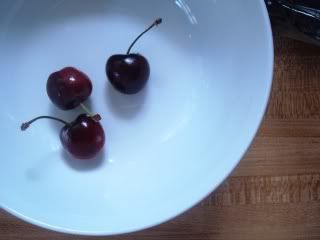
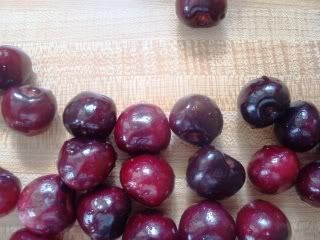
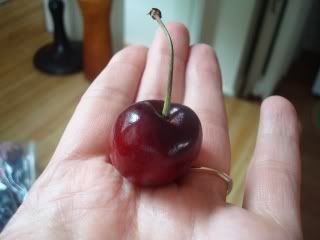
Cherries have been everywhere lately and they are cheap and ripe and ready to go. I find them hard to resist because they are so cute. So naturally I found myself with a big satchel of cherries but without the spare time or inclination to pit a mother lode of them in order to make a pie, crumble or cobbler. I wanted to do something that was, by its very definition, simple. A Sweet Cherry Simple Syrup to be used drizzled on top of ice cream, as the base for boozy cherry lemonade, in homemade popsicles or for any other host of seasonally appropriate uses. I found the finished product delicious- if a bit too sweet to be used over (already sweet) ice cream, but perfect for mixing up fizzy, summery cocktails and mocktails with

Photobucket


SWEET CHERRY SIMPLE SYRUP 


1 cup water
1 cup sugar 
1 ½ cup cherries, pitted 
Juice from one lemon 
2 inch piece lemon zest 

Photobucket 


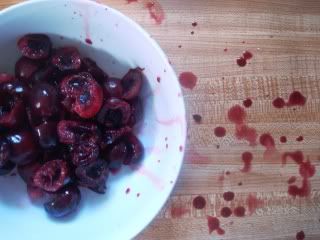
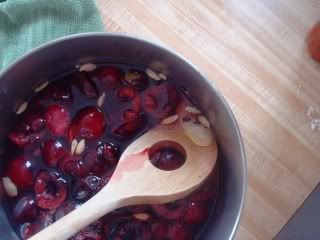
Bring water and sugar to a boil over high heat and stir gently, letting boil until clear (this happens relatively quickly so stay nearby). Reduce heat to low, add cherries, lemon juice and lemon peel. Bring to a low simmer and let cook for about 10-15 minutes.

Photobucket


Remove from heat. Let cool a bit and puree with an immersion blender or by pouring the whole mix into a food processor or blender. Let the chunky syrup sit at room temperature until completely cooled. Strain through a fine mesh strainer into a jar or glass. Store in the fridge. Makes about 1 ½ cups Cherry Syrup.

Photobucket


When I was speaking with a coworker about cherries the other day he said he didn’t like them because they have such a strong flavor connection to cough syrup. But for me, when I think “cherry” and “cough” I don’t think about syzzurp per se, but that delicious candy-disguised-as-medicinal-aid known as Loudon’s Cough Drops. When I was little and I had a sore throat if my mom bought me Loudon’s I would snarf down the whole box before I even had so much as a tickle. They were so good. As I drained this here mocktail (which could easily be turned into a grown up drink) today the sweet cherry flavor reminded me of those delicious, if useless, faux British drops of my childhood. I think I feel a sore throat coming on, I may have to go buy a box to snack on, er, sooth my throat. Or maybe I’ll just grab another ice cold Loudon’s Fizz.

Photobucket


LOUDON’S FIZZ 


1-2 tsp. Sweet Cherry Simple Syrup 
Juice from half a lemon 
1 can lemon flavored seltzer 
Ice 


Lemon slices and frozen cherries (optional)


Photobucket 


Pour Cherry Syrup over ice; add the lemon juice and garnishes, if using. Fill glass to brim with seltzer. Stir together gently and enjoy immediately.

Photobucket 


Citron vodka would be amazing in this. Or forgo the whole can of seltzer, fill the glass half full with Prosecco or Cava and top off with seltzer. I’m planning on using the remainder of my syrup in a wine-based punch for 4th of July. Look out for that recipe sometime next week.

Creative Commons License

Thursday, June 21, 2012

shoes, salsa and redemption

Photobucket

This post is long overdue. If I’m being completely honest, all my spare time is being swallowed whole by the black whole of time suck that is wedding planning. Forgive me if I alienate anyone with this next statement here: but any chick that likes this process may have a bit of a sadistic streak. Planning a wedding is like going shopping all the time. Except unlike normal shopping where you maybe end up with a cute top that makes you feel adorable every purchase carries with it the terrifying emotional weight of a tiny voice in your head that says “Yes but will this be good enough for YOUR WEDDING? Will you like this on the BIG DAY? Will anyone be offended if I don’t have this, that or the other thing??” Who started all this anyways? I believe it was Martha Stewart and at this point, she can kiss my grits because I just want my spare time back
Photobucket

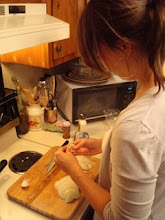
Because you know what I usually do in my spare time? I make delicious foods and then talk about them with you (and anyone with ear holes). And in my spare time the other day I tried on some heels that I got in the mail, wore my bathrobe (seriously, I want you to see this mental picture) and made a tomatillo salsa fresco that was so good I almost pulled my rotator cuff patting myself on the back. At the end of the process I kicked the heels off, put some normal clothes on and breathed a little easier. Because being in the kitchen, slicing things with my giant knife, clomping around in over priced heels made me feel whole again. And I happen to know the heels had nothing to do with it.
Photobucket

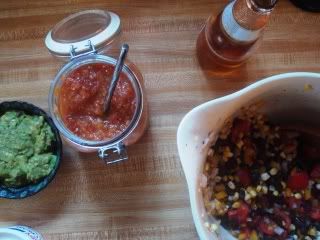
So I had to share this hot spicy salsa on this hot spicy summer day because it really came out so good it inspired my whole entire Wednesday night menu. I grilled up some fajita fillings, made a batch of guacamole and a simple corn and black bean salad and ate a big old plate of redemption. My kitchen confidence had been quite rattled after a string of crummy meals over the past few weeks and a supper like this was just what I needed to get my mojo back. Perfect fare for a sultry summer night: it was fresh and fairly healthy with plenty of spice to help us sweat through the heat. In good faith, I’m providing all three recipes here to make up for the serious lack of Dickens over the past two weeks. Enjoy.
Photobucket


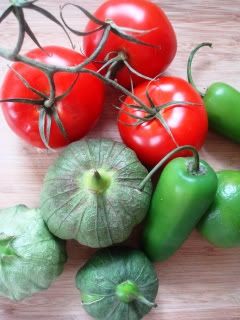
TOMATILLO and TOMATO SALSA FRESCA
(tweaked slightly from a recipe found on the kitchn)

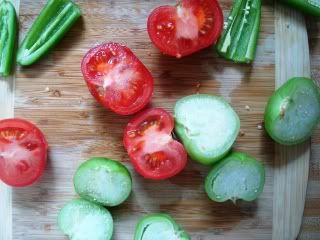
3 tomatillos
2 tomatoes
2 jalapenos, split and seeded except for one half
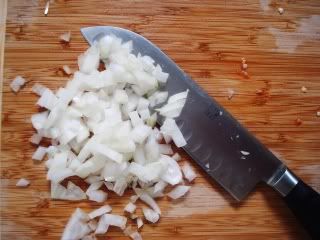
¼ white onion, finely minced
One small garlic clove
Juice from one lime
¼ cup water
Splash olive oil
Sea salt
Photobucket

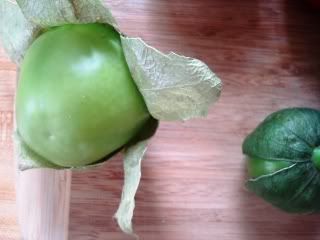
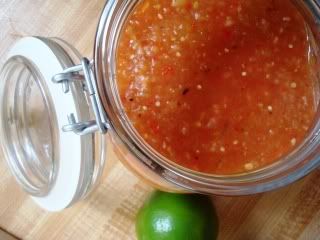
Preheat your broiler to high. Peel the papery outer skin off your tomatillos and wash them well, as well as the tomatoes and jalapenos. Cut all of the vegetables in half and remove any stems. I left the seeds in one half of only one of my jalapenos because I wanted my salsa to have a kick. Leaving this amount of seeds in made it considerably spicy in a good way; the kind of heat that leaves your mouth tingling, but doesn’t have you reaching for a glass of milk in agony. If you are a mild salsa person, I would recommend using only one jalapeno, removing the seeds completely or, using a milder pepper, like a poblano.
Photobucket

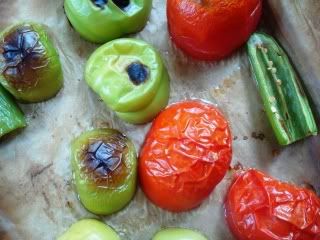
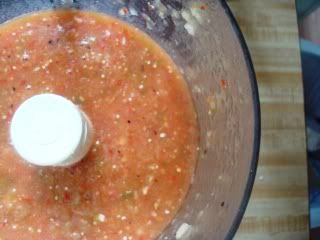
Place the veggies on a baking sheet and broil, until browned or blackened in spots, about 4-5 minutes per side. Remove veggies from the broiler and let cool for a few minutes. Meanwhile, mince your onion and place it, along with the garlic, water and lime juice in the bowl of a food processor or blender. Add the vegetables and pulse until it reaches the desired consistency. You could certainly leave this salsa a bit chunky, but I think it’s best pureed fairly well- it reminds me more of restaurant-style salsa this way. Taste, and add more salt, pepper, and lime juice if necessary. Makes a generous sized jar full. Store in the refrigerator. It tastes great right out the gate but much, much better the next day and the day after that.
Photobucket


CHARRED CORN and BLACK BEAN SALAD

2 ears fresh corn
1 can black beans, rinsed and drained
¼ bell pepper, minced
¼ Vidalia onion, minced
Diced tomatoes (optional)
Fresh Cilantro (optional)
Juice from one lime
1 tsp. cumin
Salt
Pepper
Hot sauce
Olive oil
 
Photobucket

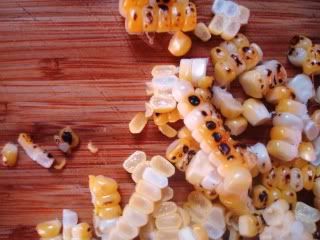
Peel and husk your corn cobs and set them on the grill, or over the open flame of a gas stove to char. Stay nearby, turning frequently, until blackened in spots. Be careful, some kernels like to burst open, sending hot corn juice spewing in various directions. Remove corn and let cool for a few minutes.
Photobucket

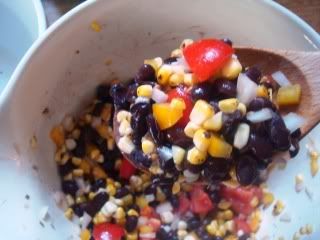
In a large bowl, combine black beans, onion and pepper. Slice the kernels off each cob of corn and add to the bowl as well, along with the tomatoes and cilantro, if using (I did not use cilantro but it would certainly work well here). Add the lime juice, cumin, salt, pepper, a few shakes of hot sauce and a small drizzle of olive oil. Stir together well and taste. Season with more salt, pepper and hot sauce if desired. Set in the fridge until ready to eat. Like the salsa, this tastes even better after the flavors have had a chance to meld.
Photobucket

GRILLED CHICKEN FAJITAS

Boneless skinless chicken thighs
Yellow or red pepper
Large white onion
Seasoned salt or spice rub
Cumin
Juice from one lime
Olive oil
Photobucket

I don’t make chicken all that often, but if I do, it’s chicken thighs done on the grill. Thighs are not only cheap, they are delicious when grilled because they rarely, if ever dry out from the high heat. They stay juicy and tender and cook up quick. And when you’re grilling in oppressive 90 degree heat at 8 at night, you really want to minimize your time in front of an open flame, right? Season each side of chicken with seasoned salt (I use Penzey’s 4S on anything I grill), cumin and cracked black pepper. Set into a bowl and add sliced bell pepper.
Photobucket

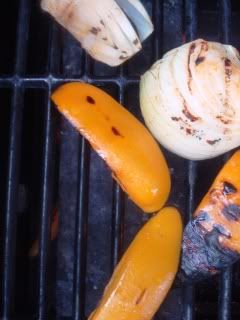
Trim your onion so that the root end is intact (so it will stay together on the grill), cutting it into large quarters, or eighths and add them to the bowl as well. Pour over the chicken and vegetables the juice from one lime and a generous drizzle of olive oil. Set in the fridge until you’re ready to grill. I only marinated this for about 15 minutes and the flavors came through very well, so while it’s not necessary to marinate for 30 minutes or more, it can’t hurt, just depends on your timing.
Photobucket

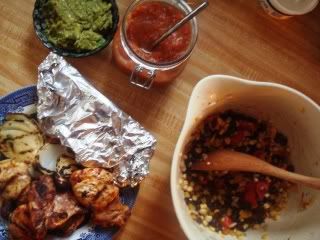
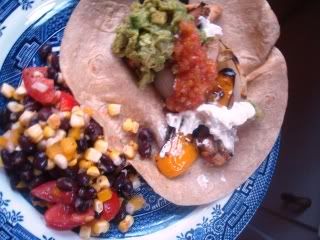
Grill over medium high heat until chicken is cooked through and the veggies are charred in spots. Serve with warm tortillas, guacamole, sour cream and tomatillo salsa, with black bean and corn salad on the side (and a six pack of ice cold Negro Modelos for good measure)
Photobucket

Creative Commons License
 
Creative Commons License
This work is licensed under a Creative Commons Attribution-Noncommercial-No Derivative Works 3.0 Unported License.