Tuesday, March 26, 2013

aromatherapy

 photo IMG_0206_zps92cdfeba.jpg

I spent far too many years of my young life unnecessarily overlooking, heck, even borderline disliking coconut. And this oversight of my youth, to me it’s just sad. Almost as sad as the amount of time I spent wearing drawstring waist cargo pants in the mid to late 1990s, but not quite that distressing. I have no earthly idea why it took me until my adult years (like the real adult years not 18-26) to come around to what is arguably now (alongside standbys peanut and chocolate) my favorite sweet flavor ever.
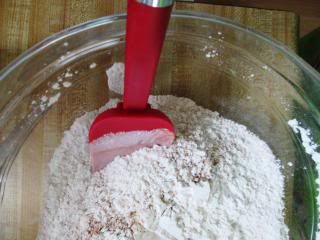
 photo IMG_0189_zpscb11de71.jpg

One of the best things about coconut to me is the power of its smell to trigger sense memory. One whiff of that warm nutty scent transports me to afternoons lathered up in sun tanning oil on Humarock beach with my girlfriends getting our leather on. This was, of course, before we all knew better and realized that in addition to potentially getting skin cancer we were also essentially ironing wrinkles into our future faces with this flagrant abuse of our skin. But regardless, the scent of coconut brings me to a deep state of relaxation and a time in my life when the only things I had to worry about was what to get on my turkey sub at lunch (why pickles and mayo of course) and what time my shift at Dribbles started.
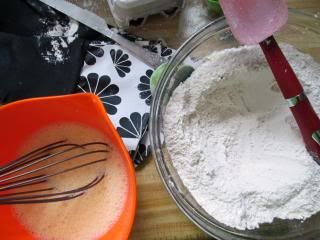
 photo IMG_0191_zps12aff315.jpg

So last week, when I happened across this recipe for a quick loaf of coconut bread, I promptly put the computer down, marched to my kitchen and whipped it together in about 10 minutes. Then, for the next hour, my whole house was progressively filled with the luxurious scent of warm, toasty coconut. It was much needed aromatherapy to the tenth degree on a day in late March where I had awoken at 5:30 a.m. to six inches of snow, which later turned to rain, then to hail, then to rain again. Inside the comfort of my kitchen, despite the disgusting weather outside, life was just beachy.

COCONUT BREAD
(found here)

2 large eggs
1 ¼ cups milk
1 teaspoon vanilla extract
2 ½ cups all-purpose flour
¼ teaspoon salt
2 teaspoons baking powder
2 teaspoons ground cinnamon
1 cup granulated sugar
Approx. 1 ½ cups sweetened flaked coconut
6 tablespoons unsalted butter, melted

Nonstick cooking spray or butter for pan
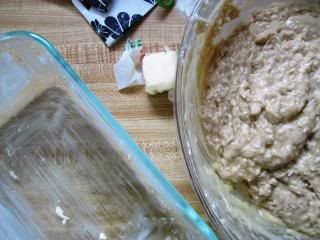
 photo IMG_0192_zps3435c997.jpg

Preheat oven to 350. In a small bowl whisk together the eggs, vanilla and milk. In a large bowl, sift together the flour, salt, baking powder and cinnamon. Add the sugar and coconut and stir together to mix. Make a well in the center and pour the egg mixture in, stir together gently with a rubber spatula until just combined. Add the melted butter and stir together again until just smooth. Be careful not to overmix. This bread is fairly dense as is and if overmixed, methinks would turn into a total coconut brick.
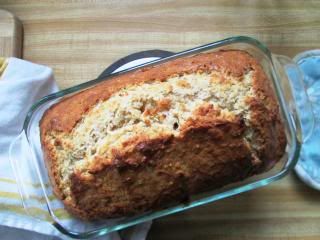
 photo IMG_0193_zpsa831ad12.jpg

Butter and flour a 9x5 inch loaf pan. Spread batter in and bake until a skewer or knife inserted in comes out clean. Between 1 and 1 ¼ hours. Mine took an hour and ten minutes exactly. My oven runs just slightly cool. Set the timer for an hour and if it’s still wet in the middle check it every five minutes or so until cooked. Let cool before serving.
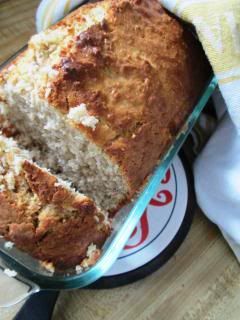
 photo IMG_0197_zps39d7dbe5.jpg

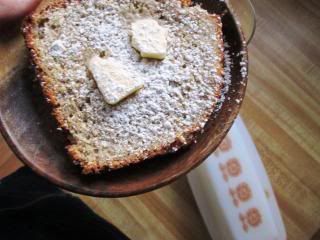
This bread is not overly sweet by any means and mine was even less so due to the fact that I used un-sweetened flaked coconut because that’s all I had on hand. The serving suggestion on SK, to serve toasted with a bit of butter and a dusting of powdered sugar is straight heaven. I ate it every day for breakfast last week with a small bowl of yogurt (for good measure). Just a little touch of salty butter and a light dusting of sweet sugar makes this already yummy bread a totally transcendent breakfast treat.

 photo IMG_0202_zps48c1a28b.jpg

This bread would be a killer addition to a brunch spread or would make an amazing base for a coconut almond sundae. Top a warm slice with a scoop of vanilla ice cream, chopped almonds and hot fudge. Heck, you could even have that for breakfast. You won’t find anyone to judge you for doing that here.

Creative Commons License

Thursday, March 14, 2013

be here now

Photobucket

I hate to complain about the weather. Because really, if we chose another thing that we could possibly have any less control over it would be what the sky is going to do on any given day. We got married outside in late September with not much of a backup plan to speak of. And while September is arguably the nicest month of the year in Massachusetts, it was a slightly risky thing to do. It could have been 50 degrees and cloudy, it could have been unseasonably sweltering but you know what it was? It was f*cking perfect. It was 70 degrees without a cloud in the sky or nary a ripple on the surface of the Atlantic Ocean.

Photobucket

People asked me a LOT in the weeks leading up to the wedding if I was worried about the weather or if I had checked the forecast. I responded the same every time: I can’t control it anyway, so why am I going to stress myself out about it? I’m actually impressed in hindsight at this Zen-ness I had embraced and I know that a lot of that ‘letting go’ mentality was thanks to a devoted and regular yoga practice and a devoted and regular wine drinking practice; and also, the fact that I just really did not want one more iota of information to manage in my overtaxed bridal brain.

Photobucket

So I feel like a traitor to my former Zen self when I admit that I have so had it up to here with this winter. I spent the better part of last Friday morning in a snowstorm induced mini meltdown during which I may or may not have chucked my snow shovel to the ground in frustration once or four times. I mean, get over it, really. Today, yes it is still cold, but the sun will be in the sky until well past 6 o’clock tonight and that, that my friends, is a win for US. This savory bowl of comfort food is a nod to this in between place that March occupies. Not quite yet finished with winter, but still we can see spring ahead. Healthy, practical and jazzed up by a verdant drizzle of deeply green infused oil that is both earthy and bright, it was the perfect lunch for right now.

Photobucket

SAVORY VEGETABLE BROTH with VINEGAR POACHED EGG,
FARRO and PARSLEY SCALLION OIL

1 leek, thinly sliced (white and light green parts only)
2 carrots, peeled and finely diced
1 parsnip, peeled and finely diced
1 small onion, minced
4-5 cloves garlic, minced
1 (32 oz.) container chicken or vegetable stock
1 ½ cups water
Salt
Pepper
Olive oil
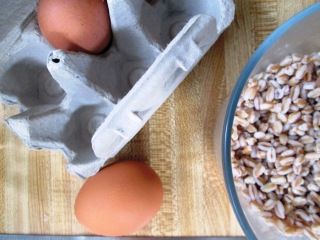
1 cup farro or small pasta, prepared according to package directions (optional)

1 egg
White wine or apple cider vinegar

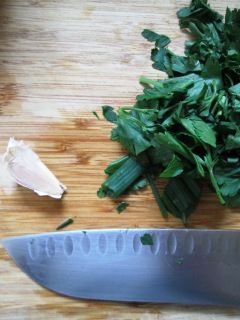
1 small garlic clove, peeled and left whole
½ bunch flat leaf parsley, loosely chopped
2 scallions, chopped

Photobucket

Warm a few tablespoons of olive oil in a Dutch oven over medium heat; add leeks and onion and sauté until fragrant. Add carrots and parsnip to the pot and sauté another few minutes to soften. If it starts to get dry, add another small drizzle of olive oil. Add garlic to the pot and stir together until fragrant (about 1 minute). Pour in chicken stock and 1 cup water, season with a large pinch of salt and plenty of cracked black pepper; bring to a boil then reduce to a simmer and let cook until the root vegetables are cooked through (about 20 minutes). If your broth had reduced substantially, feel free to pour in another ½ cup of water. Test vegetables for doneness and season again, generously, with salt and pepper.

Photobucket

While the stock simmers, prepare the Parsley Scallion Oil: rub the garlic clove all over the inside of a small food processor. This sounds a bit weird but somewhere along my food obsessed travels, I saw someone do this trick with a salad bowl and rather than imparting the bracing, almost hot flavor of raw garlic into your oil, it really just sort of shows the garlic to the product. It’s a little bit coy in that sense. Combine parsley, scallions and ¼ cup olive oil. Top with a large pinch of salt and a few cranks of pepper. Puree this for several minutes, pausing to scrape the bowl down a few times.

Photobucket

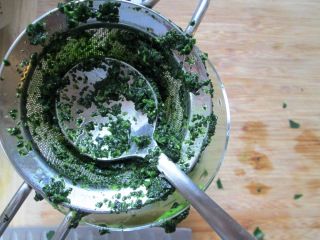
The end result should look like a slightly darker version of your favorite pesto, only even more mashed. Using a small mesh strainer (I have one for cocktails that is perfect here) drain the oil into a small glass or ramekin. Use the back of a soup spoon to press down, releasing more oil. Feel free here to work it a little, leave it to drip, then come back to it and press a bit more. You really only need a small drizzle of the finished product, so don’t stress if you’re not getting more than a few teaspoons. Infused oils like this one are a pretty and sophisticated way to jazz up a dish. I think this particular oil would be so delicious on a piece of poached or broiled white fish or salmon.

Photobucket

To vinegar poach an egg: bring a few cups of water and about 2-3 teaspoons of vinegar to simmer in a small sauce pan. To me, simmering is when the entire bottom of the pan is covered in little air bubbles and the water is steaming steadily; i.e.: almost boiling, but decidedly NOT boiling. Use the handle of a spoon to stir a whirlpool into the water and gently slide your egg into the vortex (side note: Slide Your Egg Into the Vortex would be an excellent R&B song title for baby making). Let the egg simmer for about 3-4 minutes and use a slotted spoon to gently remove it from the water. I like to lift my egg out of the water at the 3 minute mark, jiggle the spoon slightly and see what it looks like. If it’s uber jiggly: slide it back into the water for another minute, you want your whites gently cooked but the yolk nice and gooey.

Photobucket

Mound cooked farro or pasta into the bottom of a wide shallow bowl; spoon the finished vegetable broth over the top and gently nudge your poached egg into the middle of the bowl. Drizzle a few drops of bright green Parsley Scallion Oil on the top and enjoy immediately.

Photobucket

Say, check out all this green and orange. I must be channeling my Irish roots and prepping for St. Patrick's Day. Here's a classic recipe if you want to recreate some yummy pub-style fare at home from the PD archives.

Creative Commons License

Thursday, February 28, 2013

kick it root down

Photobucket

It’s not that I don’t love me some root vegetables. I truly do. I’ll roast butternut squash, simmer acorn squash in curries and nosh on potatoes all winter long. It seems that the best preparation of these foods lends itself so appropriately to this cold and dark time of year. My go-to means of making veggies from the first chill of November to the last cruel snow of April (knock wood) is to dice, toss with olive oil, salt, pepper and roast in a hot oven ‘til tender. And these are good things. They are hearty; they taste good. They’re delicious on salads or pureed into creamy soups, but then you just reach a point where you’re sort of over it, right?

Photobucket

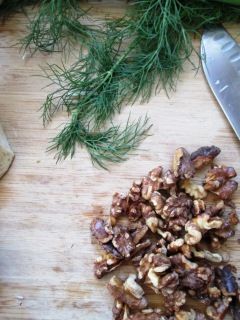
This slaw is a means of making right with root vegetables at the precise time of year when I’m ready to kick them to the curb. Inspired by a recipe I heard on NPR last week, I thought the idea of taking two root veggies and leaving them raw for a nice dose of crunch would be a super fresh way to jazz up my soup-ed out winter palate. Celery root, kind of like jicama, is more about adding texture than any kind of big flavor punch. It tastes a tidbit like its more familiar green stalks, but milder, and has a great crisp texture that balances out the more full flavored fennel. A little bit of fat from the mayo, a zing of lemon juice and some toasty, crunchy nuts made for a really yummy winter slaw that gave me the crunch I have been so desperately seeking since the days got darker. There’s a light.

Photobucket

CRUNCHY WINTER SLAW
(adapted a bit from here)

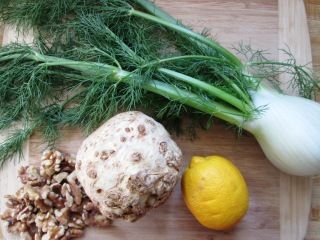
1 bulb fennel
1 celery root
½ cup walnuts, toasted
Juice from 1 small lemon
Olive oil
1 ½ tbs. mayonnaise
Salt
Pepper

Photobucket

The ideal equipment for homemade slaw is a mandolin slicer* (I have an Oxo and it’s pretty rad). Set oven to 350, scatter walnuts on a baking sheet and set to roast until fragrant and deep brown colored (about 15 minutes). While the nuts roast prepare your vegetables. Setup your slicer with the julienne blade. If you don’t have a mandolin slicer, don’t fret, just use a good sharp chef’s knife to thinly slice both vegetables into thin strips; it will take a bit more time. Cut the bulb end off your fennel, reserving the stalks and fronds. Quarter the bulb, peeling off any dinged up, dirty outer edges and slice the center of the root out from the middle. To prepare celery root: use a handheld vegetable peeler to peel off the gnarly outer skin. You will trim quite a bit off, perhaps even using your knife to trim off particularly pitted sections of the skin. Julienne both fennel and celery root using your slicer or knife and place in a medium sized bowl.

Photobucket

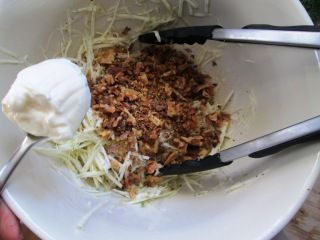
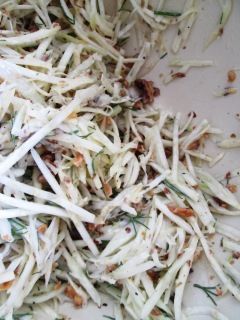
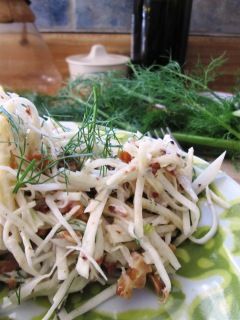
Remove the nuts from the oven and let cool for a few minutes, then coarsely chop and add to the bowl. Add lemon juice, a generous drizzle of olive oil and mayonnaise; toss together gently with tongs to coat. Season with salt and pepper to taste and feel free to adjust the dressing by adding a touch more olive oil or lemon juice if necessary. Garnish with fennel fronds. Serve immediately alongside grilled or roasted chicken; seared shrimp or fish. Will keep in the fridge for 2-3 days in an airtight container.

Photobucket

* Safety warning: be careful using a mandolin slicer, you can seriously cut yourself on those things. Every time I take mine out I recall the story my friend Kristen told me of how she sliced her finger open on one while preparing her very first Thanksgiving for her future in laws. In an effort to be brave, she spent most of the subsequent meal with her right arm raised above her head to prevent too much blood loss, assuring everyone she was fine (she wasn’t, she got stitches). It’s a (now) hilarious story about her dedication to hosting but a scary enough lesson for me to respect the mandolin for the sharp, sharp weapon that it is. Use your palm, not fingertips, or use the guide that comes with it.

Photobucket

Creative Commons License

Thursday, February 21, 2013

taste the rainbow

Photobucket

As far as visuals go, pink and green pair quite beautifully together. I know this because of the color wheel assignment I was forced to do not once but at three various times in my illustrious undergraduate art career: junior high, high school, even in college studio art (I am of course not even counting the ones I did unassigned, on my own, in my spare time because I was an insufferable art geek). I think that the art teachers were really, really keen on making sure we knew how to blend a viridian green and create a gradient scale with any color from the deck of Roy G. Biv. Hot pink and pale green in particular pair so well because they are baby-fied versions of the king and queen of contrast: red and green. Unfortunately, both pairs of colors have been co-opted by Santa Claus and the Christmas juggernaut and Lilly Pulitzer, respectively.

Photobucket

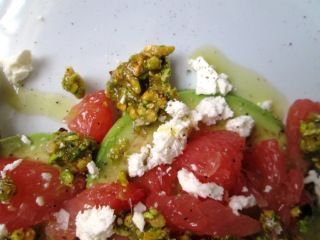
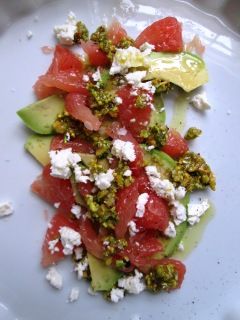
Fortunately for us, neither Kris Kringle nor the Real Housewives of Hingham, Massachusetts can lay claim to the beautiful visual interplay of this tasty little winter salad. This number is inspired by something my boss/friend (biend? fross?) Tim made at the last wine dinner we put on. The combination of sweet, bitter, salty and creamy makes for a very different kind of salad: both refreshing and savory at the same time and it made for quite a delightful lunch. It’s so bright and pretty that, when eaten with bright sunshine streaming through the kitchen window, made me almost think that it wasn’t actually February in New England and that we might not even be getting another snow storm for the third week in a row. I know from experience that this would pair perfectly with a nice glass of chilled white wine (so I guess we probably should invite the Real Housewives after all).

Photobucket

GRAPEFRUIT, AVOCADO and FETA SALAD 
with PISTACHIO ‘PESTO’

1 ruby red grapefruit, peeled, pithed and cut into sections
1 ripe avocado, thinly sliced
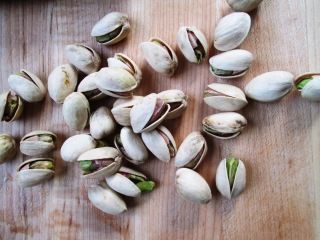
¼ cup shelled pistachios
2 tablespoons grated parmesan cheese
2-3 tablespoons crumbled feta cheese
Extra virgin olive oil
Honey
Flaked sea salt
Cracked black pepper

Photobucket

Like any good salad, the method here is mostly simple assembly. Sectioning the grapefruit is the most time consuming of the task, use a paring knife over a bowl to catch any discarded juices. My grapefruit was extra ripe, so I sliced it into thick slices and peeled sections out that way. You can save the accumulated juices for future use (like a cocktail?), or just do what I did and swig ‘em down while you make the salad. Make sure to simply pile this together on the serving plate you will be using; not mix it together in a standard salad bowl. The individual components will mush together and make something pretty ugly if you choose that path. So as my mom would say, without a shred of irony, “don’t go there.”

Photobucket

In a small food processor combine pistachios, grated parmesan and approximately 1-2 tablespoons of olive oil. Pulse until it resembles a coarsely textured pesto. On your plate or serving bowl, spoon a small swipe of pistachio pesto and arrange grapefruit sections and sliced avocado on top. Top with another spoonful of pesto, a few crumbles of feta cheese and a small drizzle each of honey and olive oil. Sprinkle with salt and pepper and eat immediately. Yields: 2 servings.

Creative Commons License

Thursday, February 14, 2013

everybody loves ramen

Photobucket

One time my mom accidentally ate some crumbled tofu off a salad bar (she mistakenly thought it was feta cheese) and when I concluded to her that it was crumbled tofu she reacted as though I had told her there was poison in her food. It’s just one of those foods many categorically dismiss before they even try it. I know because I was once among you. My sister used to make tofu a ton when she was in college. Did I mention she was a total mountain hiking, Jetta driving, Massachusetts-to-Colorado transplant crunchy hippie at the time? Oh, because she was. Right down to her plastic water bottle from Eastern Mountain Sports (adorned with girl power stickers and snowboarding logos). When she made tofu I would scoff and laugh and turn back to the meatball sub I was eating to give it the attention it deserved. She would tell me “you just have to cook it right and you get over the texture” and “it’s good because it sucks up all the flavor from whichever sauce you use and tastes like that.” Add tofu to the list of things she understood was important well before me. These types of things are what older sisters are for.

Photobucket

The issue I believe most people have with tofu is a textural one. It’s a bit, well, squishy and jiggly unless you take due time to really press the excess moisture out. Second, you have to cook it in a way that crisps it up a bit and gives it some chew. In most reputable Thai food places, this of course means deep frying. But since I have neither the time, equipment nor the metabolic structure to allow myself to deep fry on a Monday night, I needed another method if tofu was ever going to find a regular spot in my kitchen repertoire. Marinated Baked Tofu was a recipe I originally found on the kitchn.com and shared with you here (holy cow THREE years ago?). This method is solid and stands the test of time as one of my favorite salad toppings, or even just a real quick snack to munch on to get me over the hump to dinner without putting the hurt on a bag of pretzels. I like to prep and bake the tofu while I clean and slice veggies for a simple stir fry. By the time the tofu is finished baking, you’re prepped and ready to crank out a quick, healthy weeknight meal in just a few more minutes.

Photobucket

Of course you will need a good stir fry sauce. Nothing against Joyce Chen or any of the Taste of Thai empire, but I discovered a few years ago that it was relatively simple to make my very own homemade stir fry sauce if I had a few basic things in my pantry. Most of these ingredients are all shelf stable for quite some time and very cheap, so if you really love Asian food and you want to experiment with it at home (and also if you’re trying to eliminate overly processed foods- there are so many unfamiliar ingredients in those jarred sauces), invest the few dollars in the following:

       Sesame Oil (keep this in the fridge once opened)
       Soy Sauce
       Rice Vinegar
       Sriracha hot chili sauce
       Honey

The other optional alternatives I suggest investing in are sesame seeds and shelled roasted peanuts and maybe if you’re getting confident, some fish sauce. If you don’t eat the peanuts often, keep them in the freezer to prevent spoilage, fish sauce is fermented so it keeps in the pantry for quite some time. All you need in addition to these basics are scallions and garlic and maybe a small knob of fresh ginger root if the price is right at the store. These ingredients make up- for my Americanized purposes- a totally solid Asian pantry, where it is downright easy to whip together a stir fried noodle dish on any given night. This Basic Stir Fry Sauce blends together in a snap and would also make a ridiculously good marinade for flank steak, salmon, shrimp or chicken.

Photobucket

BASIC STIR FRY SAUCE

1-2 scallions, chopped
1-2 cloves garlic, peeled
1 teaspoon peeled, grated ginger (optional)
2-3 tablespoons soy sauce
2-3 tablespoons sesame oil
1 teaspoon rice vinegar
1-2 teaspoons Sriracha
1 ½ tsp. honey OR 3 big pinches of brown sugar

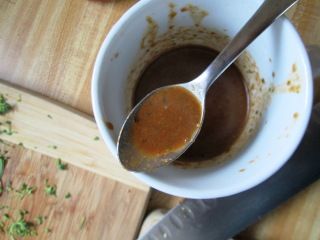
If you have an immersion blender, use it here (combine all ingredients in a wide mouth mug or jar that’s big enough to fit the blade end of your blender in and pulse until combined). If using a regular blender, combine all ingredients and pulse to combine. Taste and adjust. If it’s too salty add a touch more vinegar, another pinch or drizzle of sweetness and another dash of Sriracha. Too sweet: add a splash of vinegar and a little more soy sauce. Too acidic: add a little more oil and another pinch or drizzle of sweetness. Once it tastes good to you, set aside. (yields: about ½ cup of sauce, double portions if using as a marinade, even thinning it out with a few splashes of water if necessary).

Photobucket

Now, onto the main event: all of these supporting players come together in this yummy, satisfying stir fry. If you don’t have a wok, use a nonstick frying pan so you won’t have to use too much oil. I suggest stir frying with a neutral oil like grapeseed, peanut or canola, because the high heat you cook with in stir frying does not work well with olive oil. As for the noodles, you can always skip them and make some white or brown rice to spoon this stir fry over; but I found that using good old Murachan Ramen (yes, college ramen- we always, always have some of these) was great. The noodles cook in three minutes and you simply cannot screw them up.

Photobucket

VEGGIE RAMEN STIR FRY 

1 batch Crispy Baked Tofu
1 batch Basic Stir Fry Sauce
1 small head broccoli, trimmed into florets
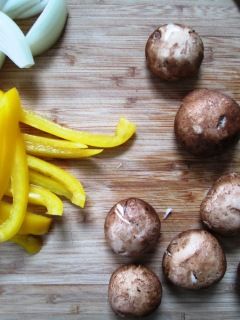
1 small onion, white or purple, sliced into strips
1 small pepper (whatever color you prefer), sliced into thin strips
¼ lb. cremini or shitaki mushrooms, cleaned and sliced
1 package instant ramen noodles (flavor packet discarded), or other noodles of your choice
Grapeseed, peanut or canola oil, for cooking

Heat 2-3 tablespoons of your chosen cooking oil in wok over medium-high heat. Set another pot to boil with 2 cups water for your noodles. (If using alternative noodles, like rice noodles or angel hair pasta, prepare your noodles first according to package instructions and set aside). Add onions and peppers to wok and toss together to coat with oil, let cook just about one minute. Add mushrooms and broccoli, tossing together again to coat with oil. Using a pot lid big enough to either cover your wok or set inside of it (I find the lid of my pasta pot works perfect), cover the pan for 1-2 minutes, then remove the lid and stir again. Cover once again for another 1-2 minute increment, remove the lid and check. At this time add your ramen noodles to the boiling water and set your timer for 3 minutes. Keep the pan uncovered and continue to cook veggies, stirring often. You want your veggies cooked of course, but still a little toothsome so they have some texture and nice, bright color. Using the lid will steam them a bit, but you’ll still be getting the yummy blistered edges from the high heat sizzle of stir frying.

Test a piece of broccoli for tenderness since they are the densest veggie you're using. Drizzle about half your sauce into the wok and toss together well. Drain the cooked ramen and add the noodles to the wok, along with the remainder of your sauce and if you like, some chopped peanuts and a sprinkle of sesame seeds. Toss together well and serve immediately, topped with a few tasty slices of Baked Tofu.

Photobucket

Creative Commons License

Thursday, February 7, 2013

all buttered up

Photobucket

Two weeks ago we traveled down to St. Louis for a wedding. We had two full days to explore the neighborhoods and check the city out. I had it in my head I wanted to enjoy some kind of local baked good or treat. At the Soulard Farmers Market we got mini doughnuts or as we jokingly called them St. Louis Calamari. I saw, at the farmers market and elsewhere, Butter Cake. I wanted to try it but I neglected it instead opting for the donuts. I thought about it even as we flew home- I felt as though the Butter Cake and I had a true missed connection and like every food I covet, I mentally bookmarked it.

Photobucket

Last week I was reading through my latest cookbook like it was a juicy romance novel. Deb Perelman of Smitten Kitchen fame is THE best food blogger out there. I have read everything she’s ever written and her recipes are always delicious, straightforward and perfectly written (not to mention beautifully photographed). If not for her doing her thing I would have probably never even realized food blogs existed, let alone could read funny and smart and with perfect technique. Of course her highly anticipated book is wonderful and has about a million things I want to make immediately, if not sooner. And lo and behold I stumbled upon this recipe, in which she marries her famous snickerdoodles (soft and crumbly cinnamon sugar cookies- yuuum) to none other than St. Louis Butter Cake. I went put the book down and went to the store and bought excess butter immediately. My bakery-related regret from the prior weekend would be realized in my very own kitchen, with a crunchy cinnamon sugar twist.

Photobucket

GOOEY CINNAMON SQUARES

Soft Cookie Base
1 stick unsalted butter, at room temperature, plus more for the pan
1 ½ cups all-purpose flour
2 teaspoons baking powder
¼ teaspoon salt
¾ cup sugar
1 large egg
¼ cup milk

Gooey Layer
¼ cup honey
¼ cup milk
1 tablespoon vanilla extract
12 tablespoons ( 1 ½ sticks) butter, at room temperature
1 cup plus 2 tablespoons sugar
¼ teaspoon salt
1 large egg
1 ¼ cups all-purpose flour.

Topping
2 tablespoons sugar
1 ½ teaspoon cinnamon

Photobucket

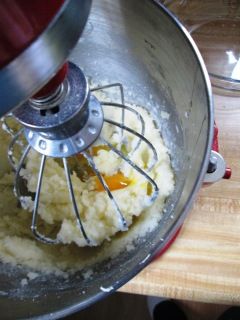
Prepare the cookie base: Preheat oven to 350. Line a 9x13 cake pan with parchment paper, and butter the paper and the sides of the pan. Set aside. In a medium bowl, whisk together the flour and baking powder. In the bowl of an electric mixer, beat butter, sugar and salt until light and fluffy. Add the egg and milk and beat until combined, scraping the bowl down and then beat for 10 seconds more. Blend in dry ingredients until just combined. Dollop the cookie base over the parchment paper and smooth into one even layer. Deb suggests using an offset spatula or a butter knife here, but I found the paper was too wily and the base too sticky to smooth out with any tool whatsoever. Instead I buttered my hands and used my fingers to manipulate the cookie mix into a nice even layer in the pan.

Photobucket

Prepare the gooey layer: Whisk honey, milk and vanilla together in a small bowl and set aside. In the bowl of an electric mixer cream the butter, sugar and salt until light and fluffy. Beat in egg, scrap down the bowl and mix for another 10 seconds. Add 1/3 of the flour and mix, then ½ of your vanilla-honey-milk mixture and mix. Repeat again, twice more, until all of the flour has been mixed until just combined. Dollop over the cookie base and spread carefully with an offset spatula or a butter knife.

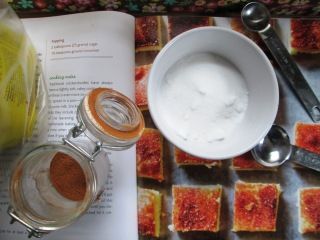
Make the topping: Combine cinnamon and sugar in a small bowl and sprinkle it all over the top.

Photobucket

Bake for 25-30 minutes until the cookies have bronzed on top. The gooey layer will rise and fall in the oven but still be a bit liquidy under the cinnamon crust when the squares are done. Let cool completely on a rack and then cut into small squares. They cut kind of messy because the bottom is like cake but the top is like undercooked gooey cinnamon sugar cookie dough. Do I have to say anything else about these?

Photobucket

Creative Commons License

Sunday, February 3, 2013

snacks for dinner

Well it's Eat Your Face Off Sunday...or I mean Super Bowl Sunday and while I'm not really the hugest fan of the grid iron big show, I am a huge fan of occasions that allow us all to eat junk food and snacks for dinner. I haven’t been cooking this week because I threw my back out (like a granny) and my routine has been dramatically upset by two days of mandatory rest, but I’m happy to report I am on the mend.

Photobucket

So, due to the fact I spent most of the week on the couch, I’m not here with a fresh recipe. Rather a collection of greatest hits, or the equivalent of when your favorite show does a flash back style clip show. That’s what I’ve got here. I’ve assembled some of the tastiest snacks from Porky Dickens’ past in case you’re still looking for something easy to make, yummy to eat and probably at least a little bit bad for you to bring to your super bowl party tonight. Enjoy!
PhotobucketPhotobucket

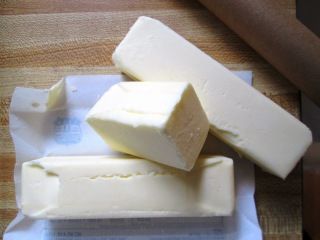
For snacks that are (slightly, a lil bit) healthy reach for: Roasted Carrot Hummus, Rosemary Roasted Cashews or Thai Spiced Cashews. All three taste delicious with cold beer.

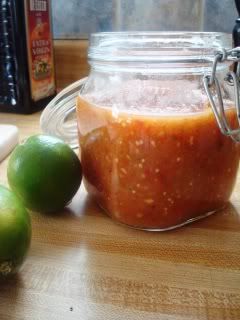
For the snack spread purists, try my updated version of Classic Onion Dip, Chunky Guacamole or an easy, fresh Homemade Tomatillo and Tomato Salsa. Another snacky classic is the giant Cheeseball, because nothing says “let’s have fun” like a giant orb molded out of spreadable cheeses.

Photobucket


For more substantial snacks, my party go-tos are Calzones or my spirit food: Meatballs. Either one will make you a popular party guest. 

Photobucket


If the people in your crew are looking for sweet snacks, here are the two best cookie recipes I’ve ever made and one of the biggest crowd pleaser sweets I've ever brought to a party. 

Photobucket

Whatever you choose to make or snack on tonight, enjoy yourself. Me, I’m probably not even going to watch the game. We’re instead going to take advantage of the fact that Super Bowl Sunday is one of the best nights of the year to get into restaurants that don’t take reservations and have notoriously long wait times, so don’t worry, our plans involve food. The most football I’ll watch today is this, because I seriously can’t stop laughing at it.
Photobucket

Creative Commons License
 
Creative Commons License
This work is licensed under a Creative Commons Attribution-Noncommercial-No Derivative Works 3.0 Unported License.